These Tuna Rice Balls are fun and tasty bites made with fluffy rice and creamy tuna. They’re easy to pack for lunch or enjoy as a snack!
Rolling them into balls is like playing with your food, and who doesn’t love that? I often add a sprinkle of sesame seeds for a little crunch. Yum!
What I adore is how quick they come together. Just mix, shape, and you’re ready to snack. Perfect for kids or a tasty treat for yourself at any time!
Key Ingredients & Substitutions
Japanese Short-Grain Rice: This rice is sticky and holds the balls together. If unavailable, you can use sushi rice or medium-grain rice, but avoid long-grain varieties as they won’t bind well.
Tuna: Canned tuna is a great option, but feel free to use canned salmon or chicken for a twist. Just make sure whatever you use is packed in oil or water for moisture.
Nori: This adds a lovely umami flavor. If you’re gluten-free or don’t have nori, you can sprinkle in some sea salt or even skip it entirely.
Mayonnaise: This keeps the mixture creamy. Vegan mayo or Greek yogurt can be used for lighter or dairy-free options.
Soy Sauce: This boosts the flavor, but tamari is a good gluten-free alternative. You can also use coconut aminos for a milder taste.
How Do I Shape Perfect Rice Balls Without Them Falling Apart?
Shaping rice balls can sometimes be tricky! The key is to use slightly cooled, sticky rice and wet your hands to prevent sticking. Here’s how:
- Mix your ingredients well so they stick together. Wet hands help keep the mixture from clumping to your skin.
- Take a handful of rice mixture, and compress it firmly into your palm, shaping it into a ball.
- Don’t skip the step of letting the balls cool for a few minutes after shaping, as it helps them hold their form during frying.
- Fry them gently and turn carefully; too much movement can cause them to break. Use a spatula for easy flipping!

How to Make Delicious Tuna Rice Balls
Ingredients You’ll Need:
- 2 cups cooked Japanese short-grain rice, slightly cooled
- 1 can (about 5 oz) tuna in oil, drained and flaked
- 1 sheet nori (seaweed), finely chopped or crumbled
- 2 tablespoons mayonnaise
- 1 teaspoon soy sauce
- 1 teaspoon sesame oil
- 1 tablespoon chopped green onions (optional)
- Salt, to taste
- Vegetable oil, for frying
- Finely chopped parsley or green herb for garnish
- Optional sauce for serving (e.g., soy sauce, teriyaki glaze, or balsamic reduction)
How Much Time Will You Need?
This recipe takes about 15 minutes of preparation and another 10–15 minutes for cooking. So in total, plan on about 30 minutes from start to finish. It’s a quick and tasty snack or appetizer!
Step-by-Step Instructions:
1. Mix the Ingredients:
In a large bowl, combine the cooked rice, flaked tuna, chopped nori, mayonnaise, soy sauce, sesame oil, and green onions if you’re using them. Mix everything together until it’s evenly distributed. You can taste the mixture at this point and add salt as needed.
2. Shape the Rice Balls:
Using wet hands (to prevent sticking), take a portion of the mixture and shape it into a small, compact ball about 2 inches in diameter. This can be done using your hands or with a rice mold, if you have one. Repeat until all of the mixture is shaped into balls.
3. Heat the Oil:
In a non-stick skillet, heat a thin layer of vegetable oil over medium heat. You want enough oil to cover the bottom of the skillet but not so much that the rice balls are swimming in it.
4. Cook the Rice Balls:
Carefully place the rice balls in the skillet. Cook them for about 3–4 minutes on each side, or until they are beautifully golden brown and crispy on the outside. Use a spatula to turn them gently, so they don’t break apart.
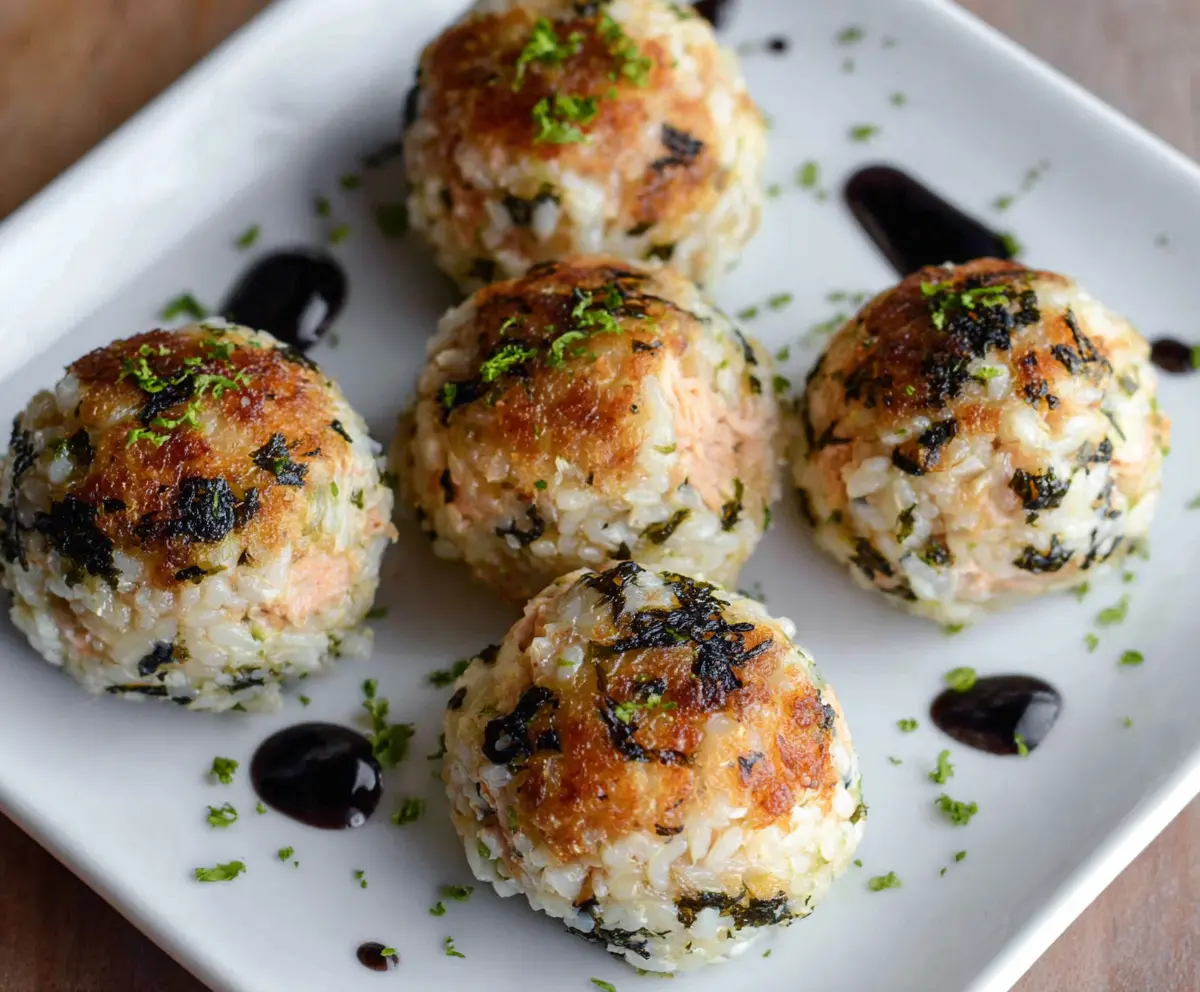
5. Drain and Garnish:
Once cooked, remove the rice balls from the skillet and let them drain on paper towels for a moment. This will help remove any excess oil. Afterward, arrange them on a serving plate and garnish with finely chopped parsley or your favorite green herb.
6. Serve and Enjoy:
Serve your tuna rice balls warm, alongside your dip of choice! A drizzle of soy sauce, teriyaki glaze, or balsamic reduction makes a beautiful presentation and adds extra flavor.
Enjoy these flavorful, slightly crunchy tuna rice balls as a snack or appetizer! They’re sure to be a hit!
Can I Use Leftover Rice for This Recipe?
Absolutely! Leftover rice is perfect for tuna rice balls. Just ensure it’s slightly cooled before mixing it with the other ingredients. This way, the rice will hold together better when shaping the balls.
What If I Don’t Have Nori?
No problem! While nori adds a unique flavor, you can simply omit it or use a sprinkle of sea salt or dried seaweed flakes as a substitute. They will still be delicious without it!
How to Store Leftover Tuna Rice Balls?
Store leftover rice balls in an airtight container in the refrigerator for up to 3 days. To reheat, simply warm them in a skillet over low heat until heated through. You can also enjoy them cold!
Can I Make These Ahead of Time?
Yes, you can prepare the mixture a few hours in advance and store it in the fridge until you’re ready to shape and fry the rice balls. Just remember to shape them right before cooking for the best texture!