This Sourdough Discard Pizza Dough is simple and fun! Using leftover sourdough starter, it creates a crispy crust that’s full of flavor. Yum!
I love making pizza night special by using this dough! Plus, it helps me clear out my sourdough starter—nothing goes to waste! 🍕
Ingredients & Substitutions
Sourdough Discard: This is the star of the show! Using unfed sourdough starter helps reduce waste and brings flavor to the dough. If you don’t have sourdough discard, you can use store-bought pizza dough, but the taste won’t be the same.
Flour: All-purpose flour works well, but you can swap in bread flour for a chewier crust. You might need more water if you switch to bread flour since it absorbs more moisture.
Warm Water: The temperature is key! If you don’t have a thermometer, aim for a temperature that feels warm but not hot to the touch. Avoid boiling water, as it can kill the yeast.
Olive Oil: Extra virgin olive oil adds flavor, but any neutral oil will do. For a twist, try flavored oils like garlic or chili oil.
Instant Yeast: This is optional. If you’re looking to speed up the rising process, use it. If you want a more pronounced sour flavor, skip it and let the dough rise longer.
How Do I Knead Dough Properly?
Kneading is essential for developing gluten, which gives your pizza dough strength and chewiness. Here’s how to do it right:
- Start by turning your shaggy dough onto a floured surface. Flour your hands a little to prevent sticking.
- Push the dough away from you using the heels of your hands, then fold it back toward you.
- Rotate the dough a quarter turn, and repeat the process. This helps develop an even texture.
- Knead for about 7-10 minutes until the dough is smooth and elastic, adding flour as needed to keep it from sticking.
Don’t rush! Kneading is just as much about feel as it is about time. A well-kneaded dough stretches easily and springs back when poked.
How to Make Sourdough Discard Pizza Dough
Ingredients You’ll Need:
For the Dough:
- 1 cup sourdough discard (unfed starter)
- 2 cups all-purpose flour, plus more for dusting
- ½ cup warm water (about 100°F/38°C)
- 1 tbsp olive oil
- 1 tsp salt
- 1 tsp sugar or honey (optional, helps with fermentation)
- ½ tsp instant yeast (optional, for additional rise)
How Much Time Will You Need?
The total time for this recipe is about 2.5 to 4.5 hours. You’ll spend about 20-30 minutes preparing the dough (including kneading), and then let it rise for 2 to 4 hours. After it rises, baking it will take an additional 10-15 minutes. You’ll be enjoying your delicious pizza in no time!
Step-by-Step Instructions:
1. Mixing the Dough:
In a large mixing bowl, combine the sourdough discard, warm water, and sugar or honey (if you’re using it). Stir well to ensure everything is blended together nicely. This mixture forms the base of your dough, giving it that fantastic sourdough flavor.
2. Forming the Dough:
Add 1½ cups of the flour, salt, and the instant yeast (if you choose to use it). Mix all the ingredients together until they form a shaggy dough—don’t worry if it looks rough at this point!
3. Kneading the Dough:
Turn the shaggy dough onto a floured surface and start kneading. Gradually sprinkle in the remaining flour as needed while you knead the dough for about 7-10 minutes. You want the dough to be soft and slightly sticky but still manageable. When it’s ready, it should feel elastic and smooth.
4. Letting It Rise:
Once you’ve kneaded the dough, shape it into a ball and place it in a lightly oiled bowl. Cover it with a clean kitchen towel or plastic wrap and let it rise in a warm place. You want it to double in size, which should take about 2 to 4 hours depending on your room temperature.
5. Prepping to Bake:
When your dough has risen and looks nice and puffy, preheat your oven to its highest setting, around 450-500°F (230-260°C). If you’re using a pizza stone, place it in the oven to heat up as well. Having a hot surface helps create a crispy crust!
6. Shaping the Pizza:
Gently punch down the risen dough to release some air, then transfer it to a floured surface. Shape it into a round or rectangle, stretching it out to your desired pizza size and thickness. Don’t worry if it’s not perfect—it’s going to be tasty no matter what!
7. Adding Toppings:
Transfer your shaped dough onto a piece of parchment paper or a pizza peel that’s dusted with flour or cornmeal to prevent sticking. Now it’s time to get creative! Add your favorite pizza toppings—sauce, cheese, veggies, or whatever you love!
8. Baking:
Carefully transfer the pizza onto the hot stone or baking sheet in the oven. Bake for 10-15 minutes until the crust is golden and crisp. Keep an eye on it so it doesn’t burn!
9. Enjoying Your Pizza:
Once baked to perfection, take your pizza out of the oven and let it cool for a minute. Slice it up and enjoy your homemade pizza made from sourdough discard dough—so delicious and fun to make!
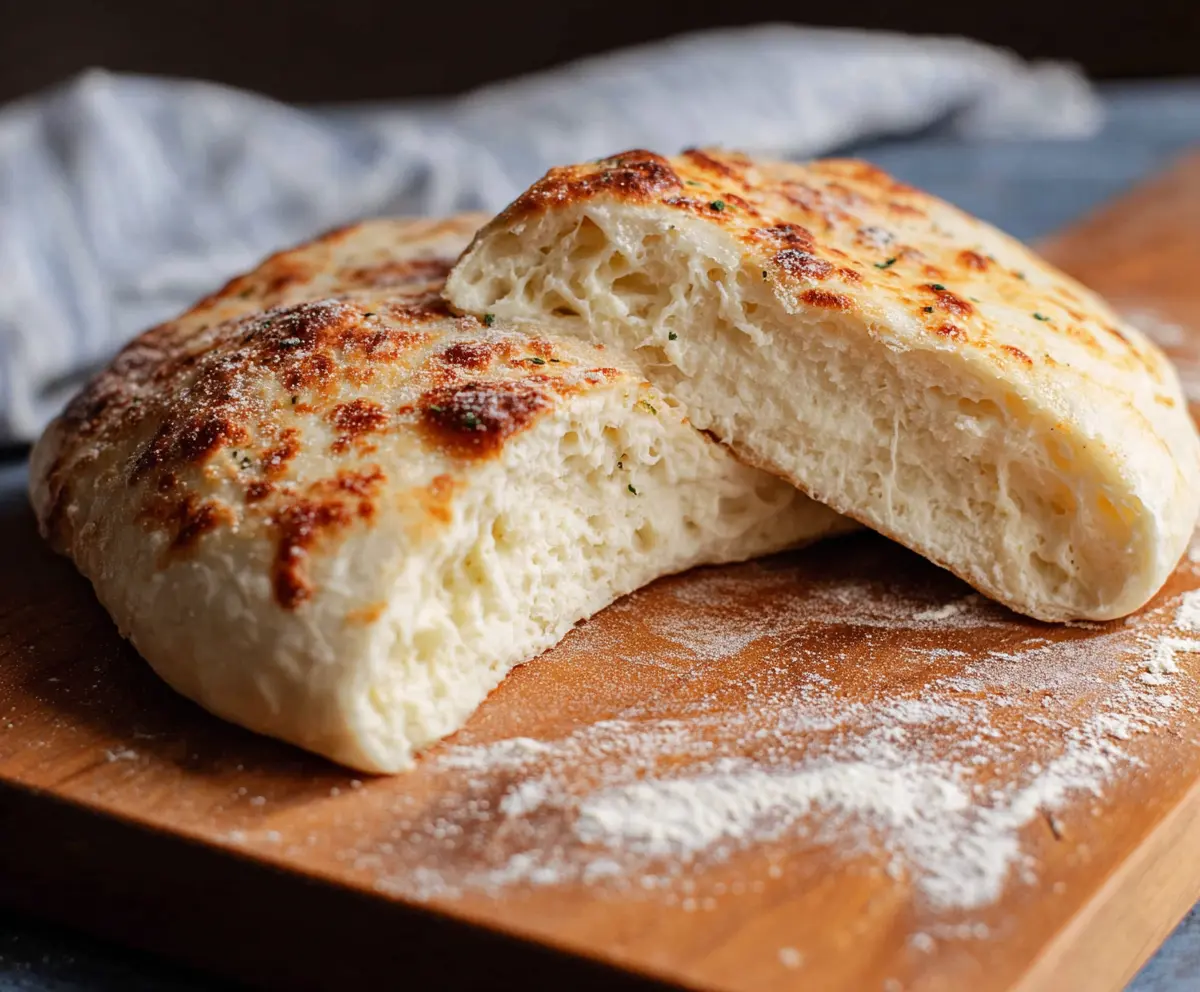
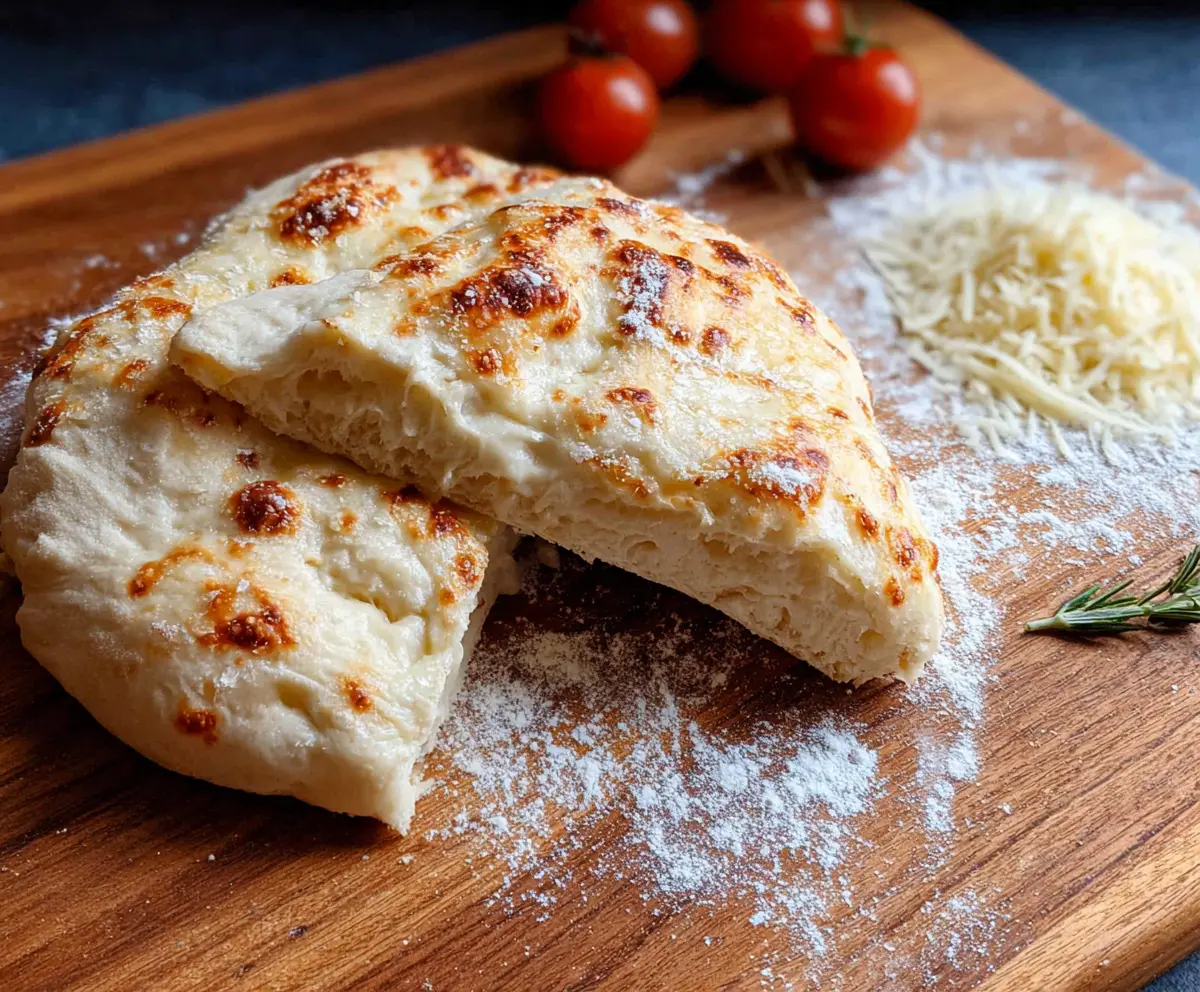
With this dough, you’ll get a chewy, flavorful base with delightful air pockets, making every bite special. Plus, it’s a great way to reduce waste while enjoying the unique tang of sourdough!
Can I Use Regular Yeast Instead of Instant Yeast?
Absolutely! You can use regular active dry yeast, just make sure to dissolve it in the warm water before adding it to the sourdough discard mixture. If using active dry yeast, allow it to sit for about 5-10 minutes until it becomes frothy before combining it with the other ingredients.
Can I Make This Dough the Night Before?
Yes, you can prepare the dough the night before! After kneading, place it in the refrigerator instead of letting it rise at room temperature. The next day, remove it about an hour before baking so it can come to room temperature and rise slightly before shaping and baking.
What Should I Do If My Dough Is Too Sticky?
If your dough feels too sticky, it’s perfectly okay to add a bit more flour as you knead. Just sprinkle small amounts of flour (1 tablespoon at a time) until you reach a soft, manageable consistency. Remember, a little stickiness is normal for sourdough-based dough!
How Do I Store Leftover Pizza?
To store leftover pizza, let it cool completely, then wrap it in plastic wrap or aluminum foil, or place it in an airtight container. It can be stored in the refrigerator for up to 3 days. For longer storage, you can freeze slices by wrapping them tightly in plastic and then placing them in a freezer-safe bag. Just reheat in the oven or microwave for a quick meal!