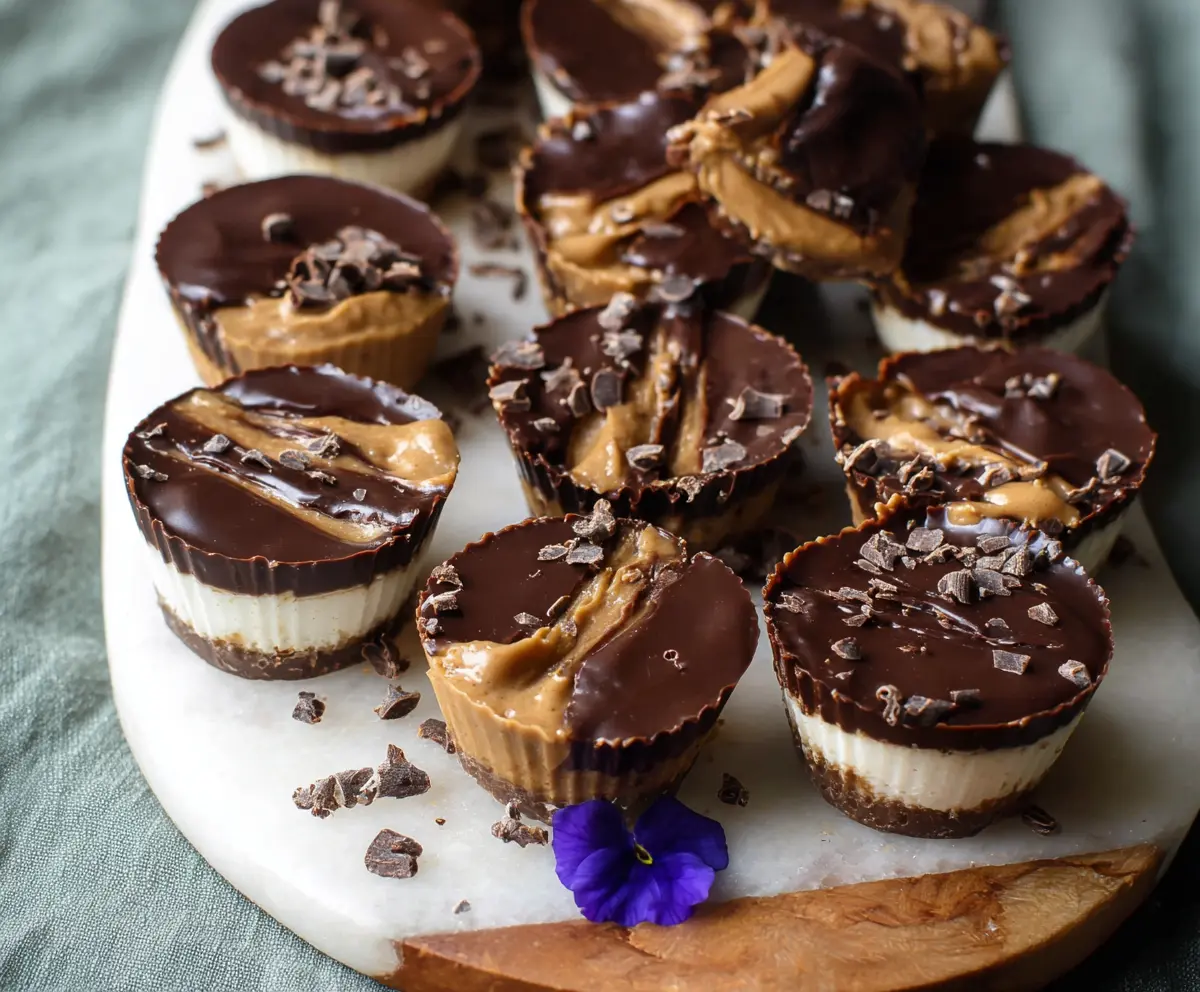
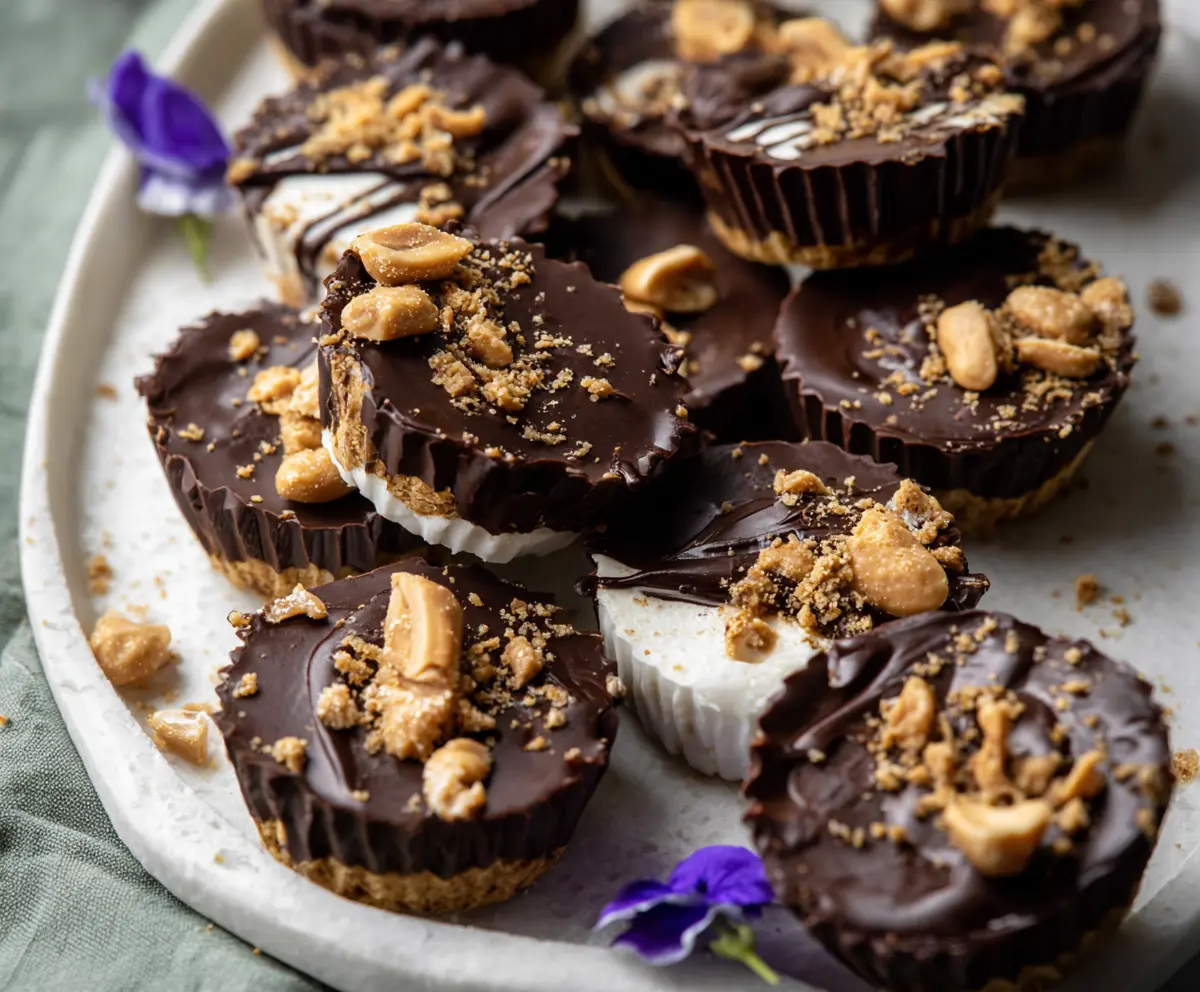
These Healthy Frozen Peanut Butter Greek Yogurt Cups are a tasty way to treat yourself without the guilt! Creamy Greek yogurt meets rich peanut butter and is topped with a drizzle of yummy chocolate.
Making these little cups is super easy! I whip up the yogurt and peanut butter mix, pop them in cups, and freeze. Perfect for a quick snack when you need a sweet boost! 🍦
Key Ingredients & Substitutions
Greek Yogurt: I recommend using plain Greek yogurt for this recipe. It’s thick and creamy, giving the cups a nice texture. You can also choose non-fat or low-fat versions based on your preference. If you’re dairy-free, try coconut yogurt instead!
Natural Peanut Butter: Smooth peanut butter is easy to mix, but crunchy adds a fun texture! If you’re allergic to peanuts, sunflower seed butter or almond butter are great alternatives that maintain the delicious taste.
Honey or Maple Syrup: Both sweeteners work well, but maple syrup offers a different flavor profile. If you’re after a lower-calorie option, consider using a stevia-based sweetener as a substitute.
Crushed Graham Crackers or Granola: Graham crackers give a nice crumbly base, while granola adds a wholesome crunch. If you want to keep it gluten-free, look for gluten-free graham crackers or use oats instead.
Dark Chocolate: I suggest using chocolate that’s at least 70% cocoa for a richer taste. If you prefer, you can replace it with dairy-free chocolate chips, or even a drizzle of almond or coconut butter for a different flavor.
How Do I Get the Perfect Layers in My Yogurt Cups?
Getting the layers just right can be a challenge, but with a few steps, you can achieve beautifully layered cups. First, ensure each layer is chilled enough before adding the next. This prevents them from blending together.
- Press the crust firmly into the bottom of the molds. This helps support the layers above.
- After freezing each layer, let it harden enough before adding the next layer. This should take about 10-20 minutes.
- When adding the peanut butter layer, warm it slightly if needed to make it easier to spread, but avoid overheating it.
- Finally, pour the melted chocolate gently on top to avoid mixing with the peanut butter layer.
With patience and these simple tips, you’ll have stunning layered cups that taste as good as they look!
Healthy Frozen Peanut Butter Greek Yogurt Cups With Chocolate Top
Ingredients You’ll Need:
For The Yogurt Cups:
- 1 cup plain Greek yogurt (full-fat or low-fat)
- 1/3 cup natural peanut butter (smooth or crunchy)
- 2-3 tbsp honey or maple syrup (adjust to taste)
- 1 tsp vanilla extract
For The Base:
- 1/2 cup crushed graham crackers or granola (for the base)
- 2 tbsp coconut oil (melted)
For The Chocolate Topping:
- 1/2 cup dark chocolate chips or chopped dark chocolate (70% cocoa or higher)
- Optional: sea salt flakes or cacao nibs for topping
How Much Time Will You Need?
This recipe requires about 15 minutes of active prep time, plus at least 2 hours in the freezer for the cups to set properly. It’s a simple process, just a bit of time waiting for things to freeze, and you’ll have a delicious treat ready to enjoy!
Step-by-Step Instructions:
1. Prepare the Base:
In a small bowl, mix the crushed graham crackers or granola with the melted coconut oil. Stir until it looks like wet sand. Take about 1 tablespoon of this mixture and press it firmly into the bottom of each silicone cupcake mold or paper liner in a muffin tin. Pop the molds in the freezer for 10-15 minutes until set.
2. Make the Yogurt Layer:
In a medium bowl, combine the Greek yogurt, honey (or maple syrup), and vanilla extract. Mix well until everything is smooth and creamy. Take each mold out of the freezer and spoon the yogurt mixture over the base until it’s about two-thirds full. Freeze for another 15-20 minutes to firm up a bit.
3. Prepare the Peanut Butter Layer:
Next, take the natural peanut butter and warm it gently, if necessary, so it’s easy to pour. Carefully dollop or drizzle the peanut butter over the yogurt layer in each cup, creating swirls or a smooth top. Return the molds to the freezer for about 10 minutes to let it set a little.
4. Make the Chocolate Topping:
In a microwave-safe bowl or double boiler, melt the dark chocolate chips with 1 tablespoon of coconut oil until smooth. Stir carefully and let it cool for a minute—don’t let it harden!
5. Top and Freeze:
Once the peanut butter layer is slightly firm, pour or spoon the melted chocolate over the peanut butter, covering it completely. If you like, sprinkle a little sea salt or cacao nibs on top for some extra flavor. Place the molds back in the freezer for at least 2 hours, or until completely set.
6. Serve and Enjoy:
When you’re ready to enjoy these yummy cups, take them out of the molds. Let them sit for a few minutes so they soften slightly before digging in. Store any leftovers in an airtight container in the freezer. Enjoy this healthy frozen treat anytime you need a sweet snack!
These Healthy Frozen Peanut Butter Greek Yogurt Cups are not only delightful but also a nutritious option with a combination of creaminess, nuttiness, and chocolaty flavor. Perfect for a sweet craving!
Can I Use Flavored Greek Yogurt Instead?
Yes, you can use flavored Greek yogurt! Just keep in mind that it will add extra sweetness and flavor to the cups. If the flavor complements peanut butter and chocolate, go for it!
What Can I Substitute for Peanut Butter?
If you’re looking for alternatives due to allergies or different preferences, almond butter or sunflower seed butter are excellent substitutes that still provide creaminess and flavor. Just ensure they’re natural and unsweetened for the best results.
How Long Can I Store These Cups?
These cups can be stored in an airtight container in the freezer for up to 2 months. Just remember to let them sit for a few minutes outside the freezer before enjoying, as they can be quite firm when frozen!
Can I Make Them Vegan?
Absolutely! To make these cups vegan, simply replace Greek yogurt with a dairy-free alternative like coconut or almond yogurt, use maple syrup instead of honey, and ensure the chocolate is dairy-free. They’ll still be delicious and indulgent!