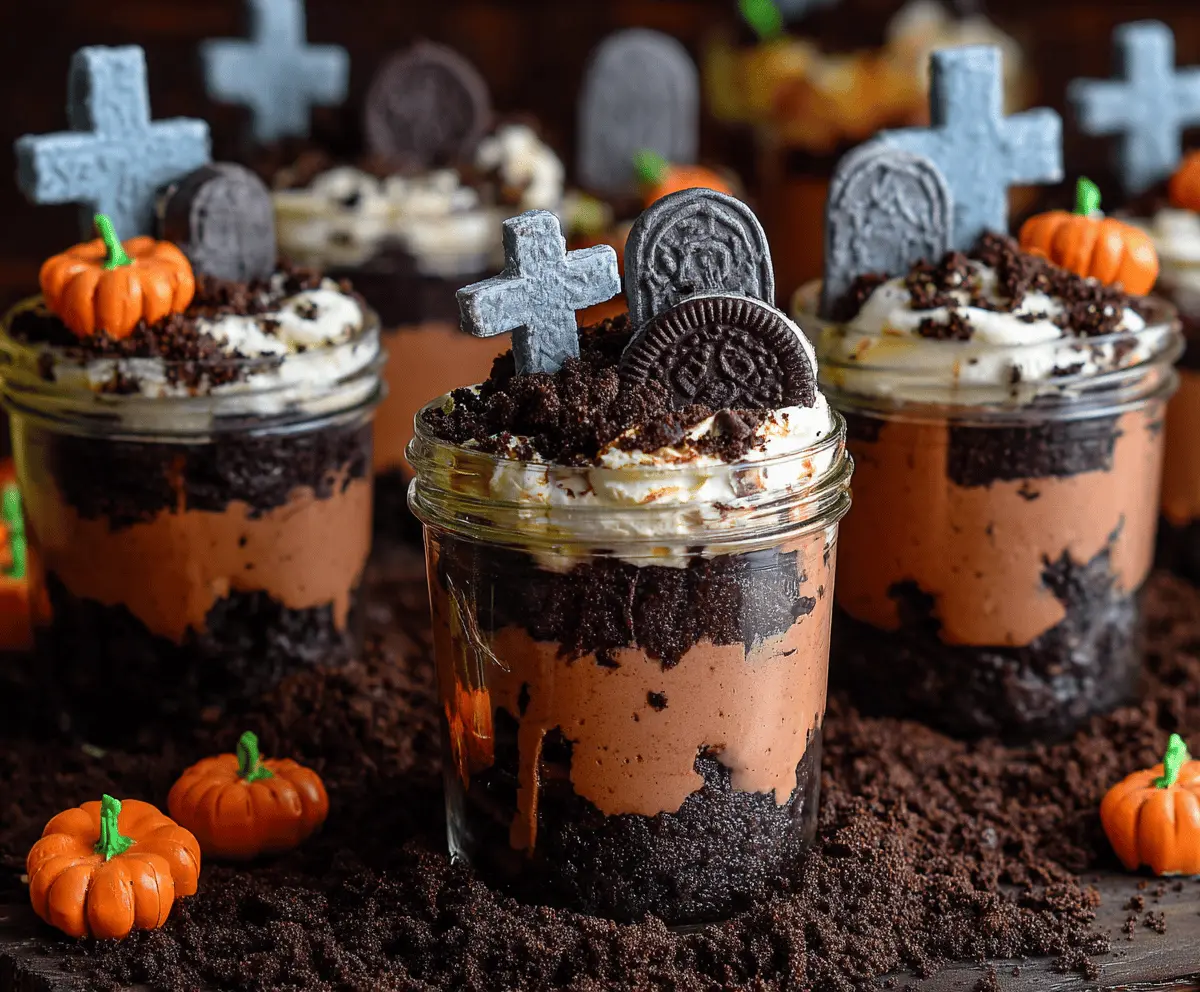
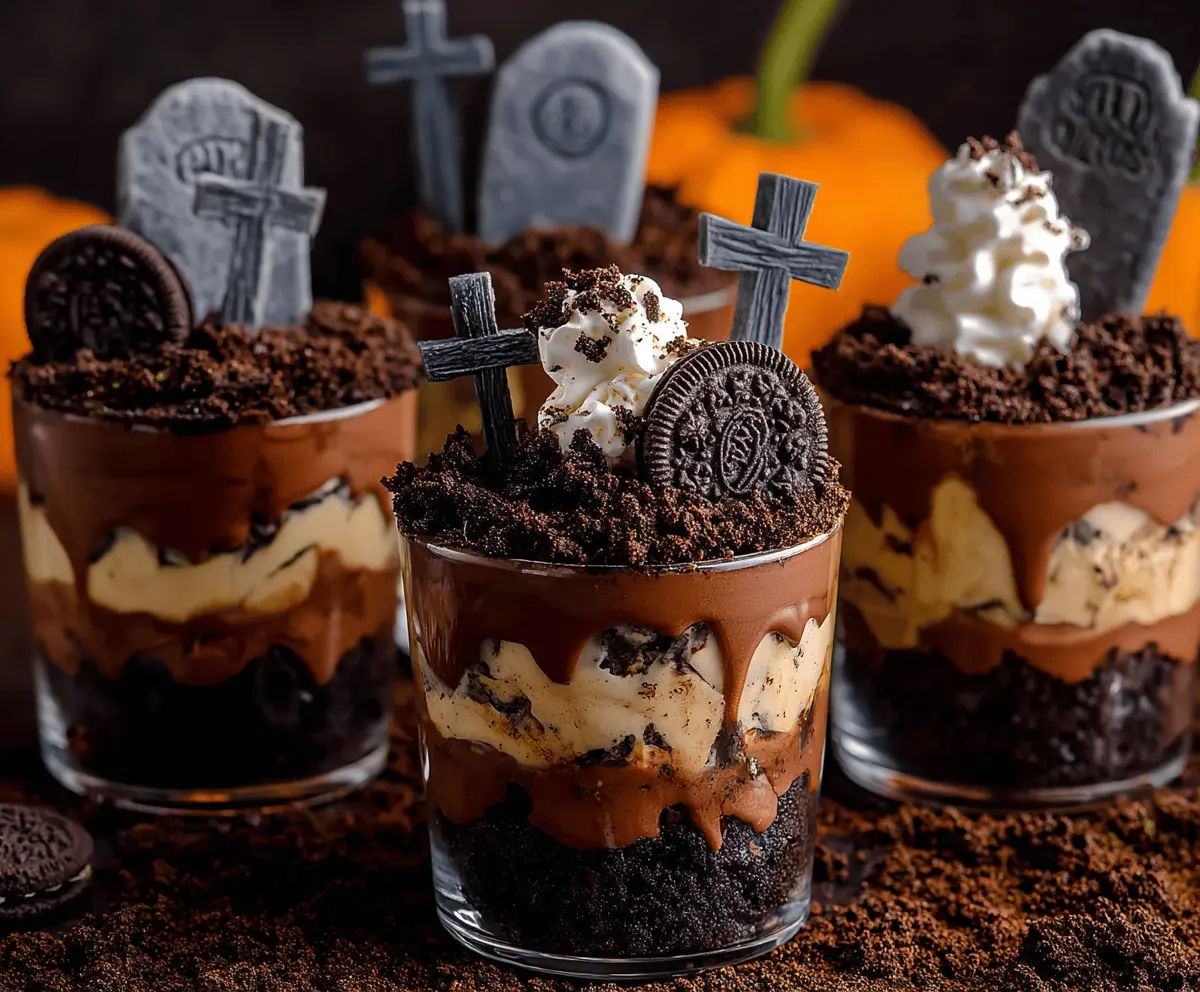
Graveyard Dirt Cups are a fun and spooky treat perfect for Halloween! Made with chocolate pudding, crushed Oreos for that dirt look, and gummy worms, they are as tasty as they are cute.
These cups are great for a party, and honestly, they’re a hit with both kids and adults. Who doesn’t love a little dirt served up sweet? I always enjoy adding extra worms—you can never have too many, right? 🐍
Key Ingredients & Substitutions
Oreo Cookies: These are perfect for achieving the “dirt” look, but feel free to swap them for chocolate graham crackers if you want a slight change in flavor. Gluten-free chocolate cookies are also great if you’re accommodating dietary needs!
Pudding: Chocolate and vanilla pudding are classic, but don’t hesitate to get creative! You could use butterscotch pudding for a different taste or a combination of chocolate and raspberry pudding for a fruity twist.
Whipped Cream: Fresh whipped cream adds a lovely touch. If you’re in a hurry, store-bought whipped topping works well, too. A hint of cocoa or vanilla extract mixed in can enhance the flavor for extra delight!
Tombstone Decorations: Mini tombstone decorations bring a festive flair. If you can’t find them, consider using gummy worms or chocolate bones for a fun touch! These candies add to the spooky theme and are usually easy to find around Halloween.
How Do I Layer the Cups Without Making a Mess?
Layering is key to the dessert’s look and here are some handy tips:
- Use a long-handled spoon or a small spatula to carefully layer your ingredients.
- Take your time! Let each layer settle a bit before adding the next to keep them distinct.
- A zip-lock bag with a corner cut off can be used to pipe the pudding layers neatly, just like a pastry bag.
Following these simple steps will help you assemble your cups beautifully!
What’s the Best Way to Serve These Cups for a Party?
Presentation matters, especially for themed desserts! Here’s how to make your cups stand out:
- Opt for clear cups or jars to show off your striped layers and decorations.
- Complete the spooky look just before serving by topping with decorations like the tombstones and a dollop of whipped cream.
- Consider smaller portions; they are perfect for parties and allow guests to enjoy multiple treats!
Beautifully served Graveyard Dirt Cups will impress your party guests and are sure to be a hit at any Halloween gathering!
Graveyard Dirt Cups
Ingredients You’ll Need:
For The “Dirt”:
- 20 Oreo cookies (or similar chocolate sandwich cookies)
For The Pudding Layers:
- 2 cups chocolate pudding (store-bought or homemade)
- 1 cup vanilla pudding (store-bought or homemade)
- 1 cup whipped cream, plus extra for garnish
For The Decorations:
- 4-6 miniature tombstone or cross decorations (edible sugar decorations or made with black/gray fondant or chocolate)
- Whole Oreo cookies for garnish
- Optional: chocolate shavings or sprinkles for extra dirt effect
How Much Time Will You Need?
This fun dessert takes about 30 minutes to prepare, plus about 1 hour for chilling in the refrigerator. It’s quick and easy to make, perfect for any Halloween gathering!
Step-by-Step Instructions:
1. Prepare the “dirt”:
Start by placing the Oreo cookies in a food processor or a sealable plastic bag. Crush them until they turn into fine crumbs. Set aside about ½ cup of these crumbs for later use on top of the cups.
2. Layer the cups:
Grab four serving glasses or clear cups. Begin layering by placing a base layer of the crushed Oreos at the bottom of each cup to create your “dirt.”
3. Add pudding layers:
Spoon a layer of chocolate pudding on top of the Oreo crumbs. Follow this with a layer of vanilla pudding that you’ve mixed with about 1 cup of whipped cream, making it creamy and rich.
4. Repeat the layers:
Add another layer of crushed Oreos on top of your pudding layers, then follow with another layer of chocolate pudding. Make sure the layers are smooth for a beautiful look!
5. Top the cups:
Finish the cups by sprinkling a generous amount of the reserved Oreo crumbs on top to resemble more dirt.
6. Decorate:
Insert the miniature tombstone or cross decorations into the top “dirt” layer. Add a dollop of whipped cream for extra flair. You can also place a whole Oreo cookie upright in some cups and sprinkle over some chocolate shavings or sprinkles for an added touch!
7. Chill:
Cover the cups with plastic wrap and refrigerate them for at least 1 hour. This chilling time allows the layers to set and the flavors to meld nicely.
8. Serve:
Once chilled, serve your delightful and spooky Graveyard Dirt Cups and enjoy this deliciously fun treat with your guests!
This dessert features layers of chocolate and vanilla pudding with crushed Oreo cookies that look like dirt, topped with whipped cream and festive graveyard-themed decorations. Perfect for Halloween parties or any fun occasion!
Can I Use Different Cookies for the “Dirt”?
Absolutely! While Oreos are the classic choice, you can substitute with any chocolate sandwich cookies or even chocolate graham crackers for a different flavor profile. Just make sure they can be crushed into fine crumbs.
Can I Make This Ahead of Time?
Yes, you can prepare these cups up to a day in advance. Just layer the ingredients as instructed, cover them tightly, and keep them refrigerated. This actually allows the flavors to blend even better!
How Should I Store Leftovers?
If you have leftovers, store them in an airtight container in the refrigerator for up to 3 days. The toppings, particularly whipped cream, may lose some texture, but the flavors will still be delicious!
Can I Use Homemade Pudding?
Of course! Homemade pudding is a fantastic choice and will make your Graveyard Dirt Cups even richer and creamier. Just ensure it’s properly cooled before layering it with the cookies and whipped cream.