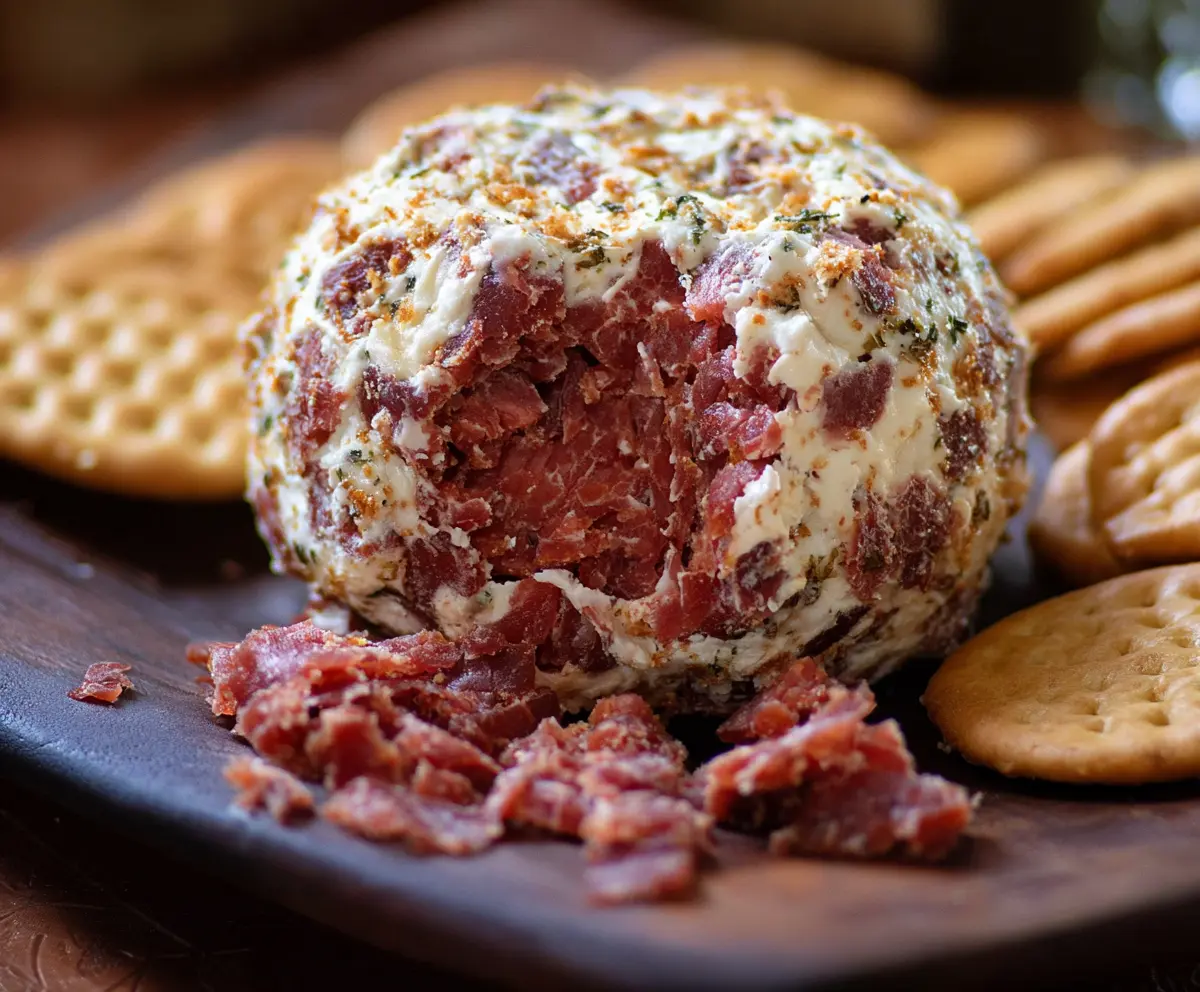
This Dried Beef Cheese Ball is a fun and tasty snack that’s perfect for parties. With cream cheese and savory dried beef, it’s creamy, cheesy, and oh-so-delicious!
It’s super easy to whip up—just mix, roll into a ball, and chill. Serve it with crackers, and watch it vanish! I always make extra, because leftovers? Not in my house! 😄
Key Ingredients & Substitutions
Cream Cheese: This is the base of the cheese ball, providing a rich and creamy texture. If you want a lighter version, you can use reduced-fat cream cheese or even Greek yogurt for a tangy twist.
Dried Beef: Dried beef adds that wonderful salty flavor. If you’re looking for a healthier option, feel free to substitute with chopped cooked bacon or even chopped smoked turkey. Just adjust the seasoning to suit your taste.
Worcestershire Sauce: This adds depth to the flavor. You can use soy sauce for a similar umami kick or make it gluten-free with tamari. A dash of hot sauce can also spice things up if you enjoy a little heat!
Fresh Parsley: Fresh herbs brighten up the dish. Don’t have parsley? Try fresh chives or green onions for a different flavor profile. Dried herbs could work in a pinch, but use half the amount as they’re more concentrated.
How Do I Make Sure My Cheese Ball Holds Its Shape?
Getting your cheese ball to maintain its shape is key for an appealing presentation. Here’s how to do it:
- Start with softened cream cheese. This makes it easier to mix and shape.
- Chill the mixture for at least 2 hours before serving. This firms it up, making it easier to form a ball.
- Use plastic wrap to help shape the cheese ball. This keeps your hands clean and helps mold it perfectly.
- Rolling the ball in the reserved dried beef adds a sturdy outer layer that helps it hold together and looks great.
With these tips, your cheese ball will be ready to impress your guests!

How to Make a Dried Beef Cheese Ball?
Ingredients You’ll Need:
- 8 oz cream cheese, softened
- 4 oz dried beef, finely chopped or crumbled
- 1 tablespoon butter, softened
- 1 teaspoon Worcestershire sauce
- 1/2 teaspoon garlic powder
- 1/2 teaspoon onion powder
- 2 tablespoons chopped fresh parsley (plus extra for garnish)
- Salt and black pepper to taste
- Crackers, for serving
How Much Time Will You Need?
This delightful cheese ball takes about 15 minutes to prepare. After that, you’ll want to refrigerate it for at least 2 hours to let it firm up and let the flavors come together. In total, you’re looking at around 2 hours and 15 minutes, but most of that is just chilling time!
Step-by-Step Instructions:
1. Mix the Base:
Start by taking your softened cream cheese and butter and placing them in a medium bowl. Use a fork or electric mixer to blend them together until the mixture is smooth and creamy. This will make the base of your cheese ball super flavorful!
2. Add the Flavor:
Next, add the Worcestershire sauce, garlic powder, onion powder, chopped parsley, salt, and black pepper to the cream cheese mixture. Stir everything together until it’s well combined and all of the ingredients are mixed in evenly.
3. Incorporate the Dried Beef:
Now, fold in the majority of the chopped dried beef. Make sure to save some to roll on the outside of the cheese ball later! Gently mix until the beef is well distributed throughout the cheese mixture.
4. Shape the Cheese Ball:
Using your hands or plastic wrap, carefully shape the mixture into a ball. If you want, you can use the plastic wrap to make it nice and smooth, ensuring that it holds its shape well.
5. Coat the Outside:
Roll your cheese ball in the reserved dried beef and any extra chopped parsley for a beautiful and tasty outer layer. This makes it look pretty and adds extra flavor!
6. Chill Time:
Wrap the cheese ball in plastic wrap and place it in the fridge for at least 2 hours. This step is important to firm it up, so it’s easy to slice and spread when you’re ready to serve.
7. Get Ready to Serve:
When you’re ready to serve, unwrap the cheese ball and place it on a plate. Surround it with your favorite crackers, and feel free to sprinkle a little extra parsley on top for a nice touch.
8. Dig In!
Grab some crackers, spread the delicious cheese ball on top, and enjoy! It’s a hit at every party and perfect for snacking anytime. Enjoy your creation!
Can I Use Low-Fat Cream Cheese for This Recipe?
Yes, you can use low-fat cream cheese if you’re looking for a lighter option. It may slightly alter the texture, making it less creamy, but it will still taste great!
How Long Can I Store Leftovers?
Leftover cheese ball can be stored in an airtight container in the fridge for up to 5 days. Just make sure to keep it covered to maintain its freshness!
Can I Freeze the Cheese Ball?
Yes! You can freeze the cheese ball before chilling it in the fridge. Wrap it tightly in plastic wrap and then foil. When ready to eat, thaw it overnight in the fridge before serving. It will be just as tasty!
What Can I Serve with the Cheese Ball Besides Crackers?
In addition to crackers, you can serve it with fresh veggie sticks like celery, carrots, or bell peppers for a crunchy snack. Sliced baguette or pretzel chips also pair nicely!