Today, I want to share some wonderful coconut cookie recipes that are perfect for any time. If you love the taste of coconut and bright fruit, you’re in the right place for delicious ideas.
I’ve put together two of my favorite simple cookie ideas that bring a lot of cheer to your baking. Get ready to bake something sweet and special with these easy guides, perfect for your kitchen.
Jump to Recipe:
Zesty Coconut Key Lime Crinkle Cookies
These coconut key lime cookies bring a bright, zesty lime taste with a sweet coconut touch. They are soft and chewy, perfect for a sunny day treat.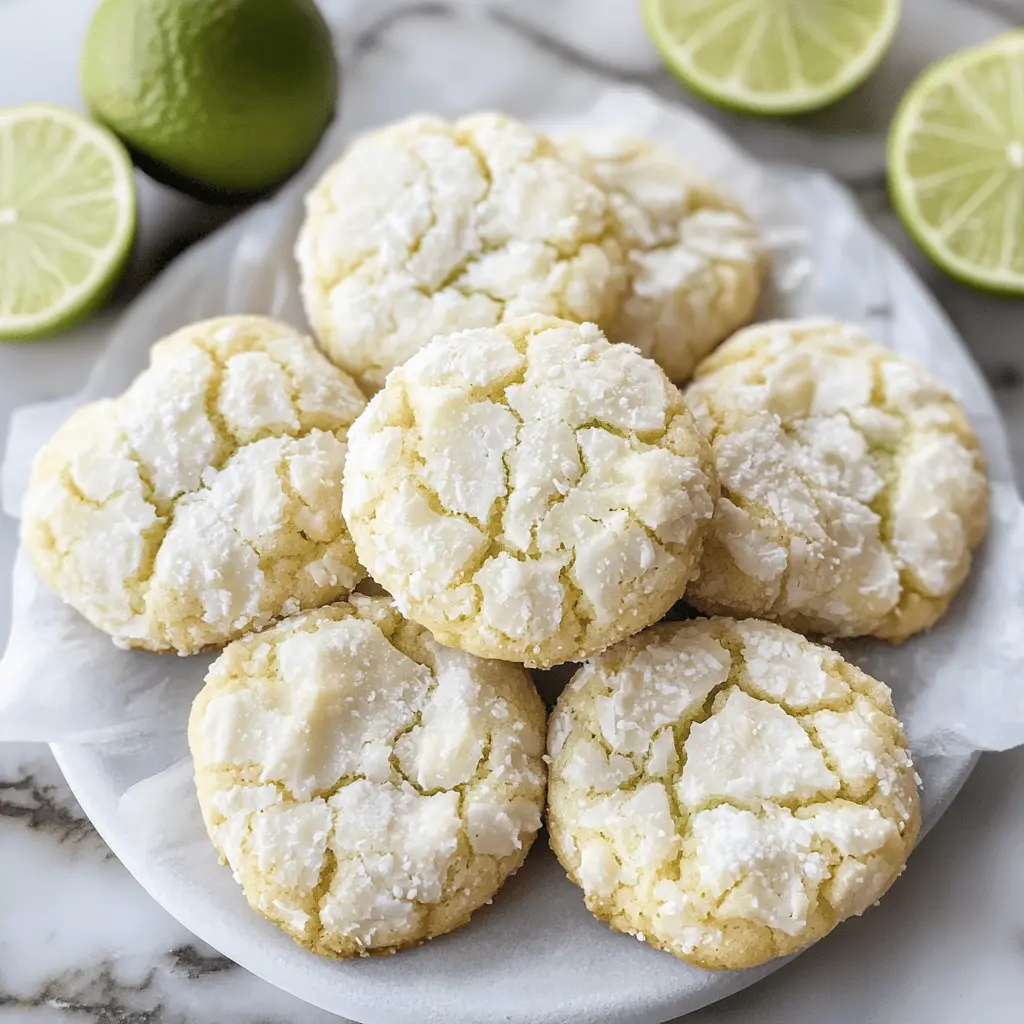
Key Ingredients & Tips for Crinkle Cookies
- Fresh Lime Zest: Use fresh key lime zest for the best bright flavor. It really makes a big difference in the taste.
- Powdered Sugar Coating: Roll your cookie dough generously in powdered sugar before baking. This step is key for that classic crinkle look.
What You Need for Coconut Key Lime Crinkles
- All-purpose flour
- Granulated sugar
- Fresh key lime juice and zest
- Shredded coconut
- Powdered sugar (for rolling)
⏱️ Time: 30 minutes🍽️ Yields: 2 dozen cookies
How to Make Coconut Key Lime Crinkle Cookies
Step 1: Mix Wet Ingredients
Start by creaming together your butter and granulated sugar until the mixture is light and fluffy. Then, beat in the fresh key lime juice and zest.
Step 2: Combine Dry and Form Dough
Gradually add the all-purpose flour and any other dry ingredients to your wet mixture until everything is just mixed. Fold in the shredded coconut gently until it’s evenly spread throughout the dough.
Step 3: Roll and Bake Your Crinkles
Roll small balls of dough generously in powdered sugar. Place them on a baking sheet and bake according to your recipe until the edges are set and the centers are still soft and chewy.
📝 Final Note
Store these bright lime cookies in an airtight container at room temperature to keep them fresh and soft for a few days.
Sweet Coconut Raspberry Thumbprint Cookies
These pretty cookies combine a tender coconut base with a sweet and tangy raspberry jam center. They are simple to make and always a hit with everyone.
Key Ingredients & Tips for Thumbprint Cookies
- Unsweetened Shredded Coconut: Using unsweetened coconut helps balance the sweetness from the jam. You can lightly toast it first for a deeper flavor.
- Quality Raspberry Jam: Choose a raspberry jam that you really love, as its fruity flavor will stand out in these cookies.
What You Need for Raspberry Thumbprint Cookies
- Softened butter
- Granulated sugar
- All-purpose flour
- Shredded coconut
- Raspberry jam
⏱️ Time: 40 minutes🍽️ Yields: 2.5 dozen cookies
How to Make Coconut Raspberry Thumbprint Cookies
Step 1: Prepare the Cookie Dough
Cream together your butter and sugar until it’s light and fluffy. Then, gradually add the flour and shredded coconut to the mixture, mixing until a soft dough forms.
Step 2: Shape and Fill
Roll the cookie dough into small, even balls. Place them on a baking sheet, then use your thumb or the back of a spoon to make a small indent in the center of each ball. Fill each indent with a dollop of raspberry jam.
Step 3: Bake Until Golden
Bake the cookies in your preheated oven until they are lightly golden around the edges and the raspberry jam is bubbly and set. Let them cool slightly before moving them.
📝 Final Note
If the jam looks a little dry after baking, you can add a tiny bit more warmed jam to the centers for a fresh and shiny finish.