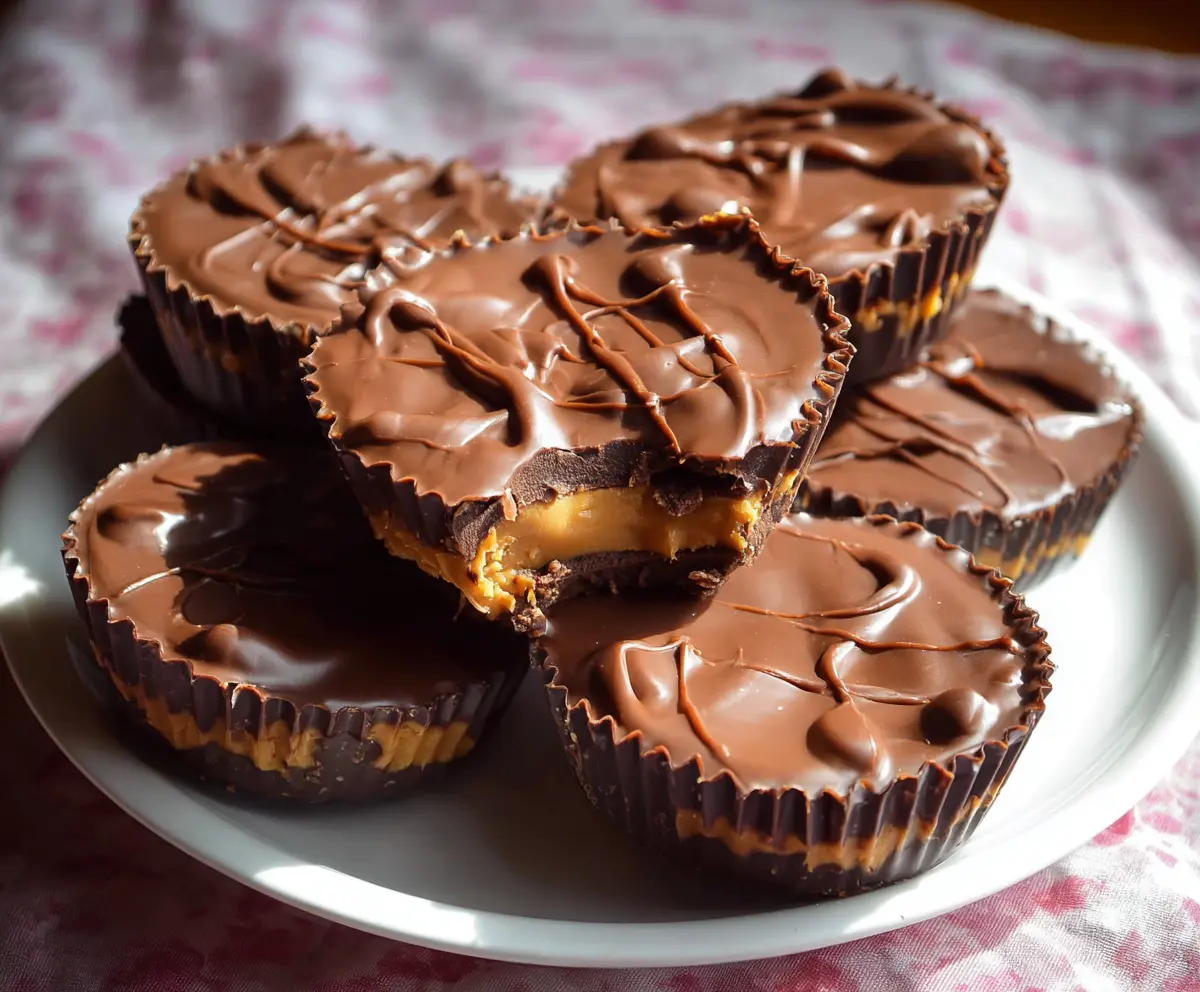
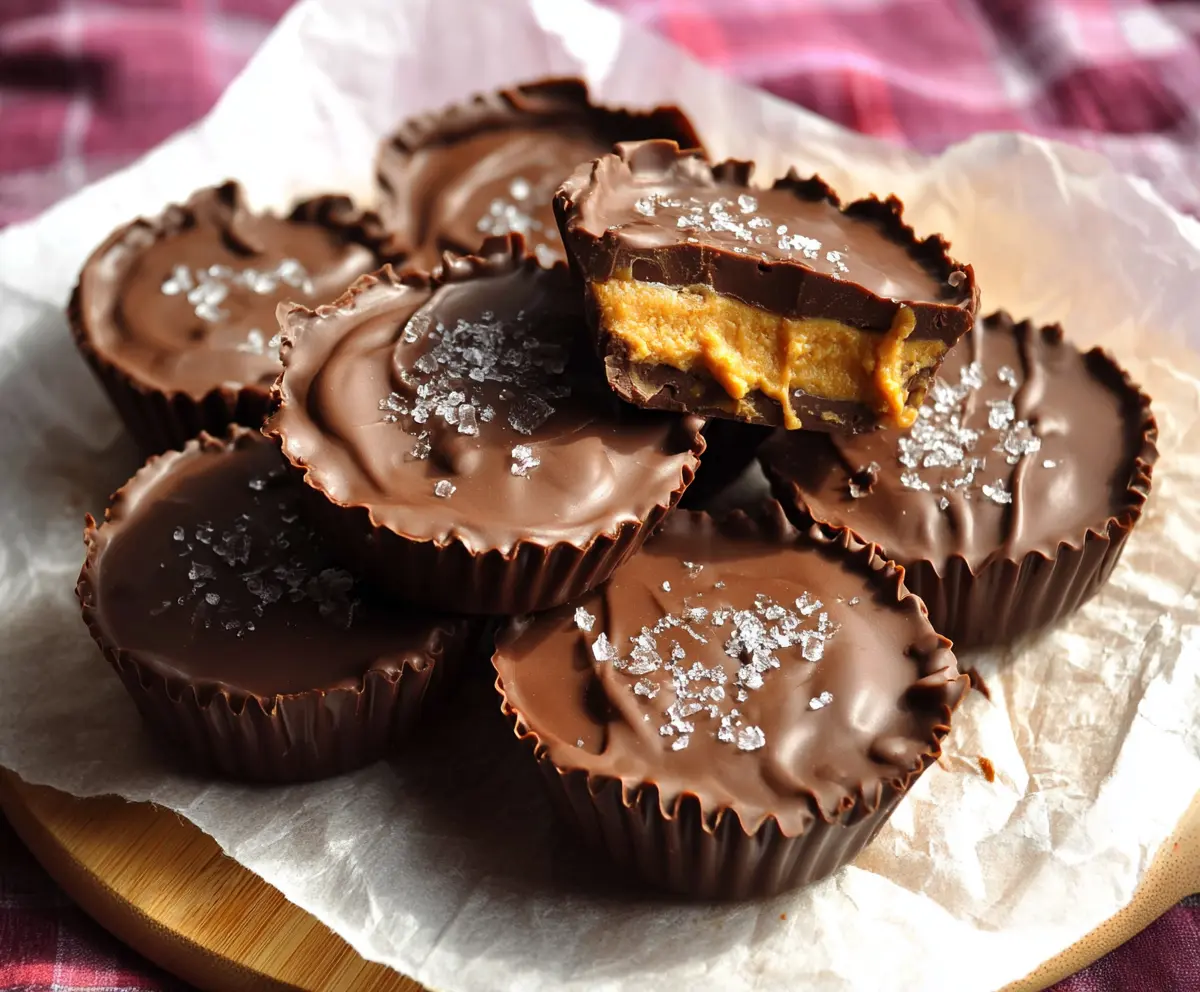
These Chocolate Peanut Butter Cups are smooth, sweet, and oh-so-tasty! The creamy peanut butter filling is surrounded by rich chocolate, making a perfect treat for any satisfying snack.
Honestly, they’re like tiny pieces of heaven! I love whipping these up on a cozy day—it’s so easy, and I can’t resist taking a few to enjoy while watching my favorite show!
Key Ingredients & Substitutions
Peanut Butter: Creamy peanut butter is essential for that smooth filling. If you prefer chunky, it’s alright to use that too! For a nut-free version, try sunflower seed butter or almond butter. Just check for allergies!
Unsalted Butter: This adds creaminess to the filling. If you’re dairy-free, use coconut oil or a vegan butter substitute. They work well without losing too much flavor.
Powdered Sugar: This keeps the filling sweet and smooth. If you’re looking for a healthier option, coconut sugar or maple sugar can work, but the texture might change a bit.
Chocolate: Semi-sweet chocolate is typical for this recipe, but dark or milk chocolate can be used based on your preference. For a healthier version, dark chocolate with high cocoa content is a great choice!
Coconut Oil: This is optional but makes the chocolate smoother when melted. If you don’t have it, you can skip it, but the texture might be a little different when coating.
How Can I Melt Chocolate Smoothly Without Seizing?
Melting chocolate can be tricky! Here’s how to do it right:
- Always melt chocolate in short bursts of 30 seconds in the microwave. This helps it heat evenly and reduces the risk of burning.
- Make sure your bowl is completely dry. Any moisture can cause the chocolate to seize up.
- Stir well between intervals. This promotes even melting, and residual heat will continue to melt any small bits.
- If using a stovetop, employ a double boiler method to keep the chocolate warm without direct heat, which can easily burn.
With these tips, you’ll have perfectly melted chocolate for your cups every time! Enjoy the delicious process of making your treats!
How to Make Chocolate Peanut Butter Cups
Ingredients You’ll Need:
For the Peanut Butter Filling:
- 1 cup creamy peanut butter (preferably unsweetened or natural)
- 1/4 cup unsalted butter, softened
- 1/4 cup powdered sugar, sifted
- 1/2 teaspoon vanilla extract
- Pinch of salt (optional, enhances flavor)
For the Chocolate Coating:
- 2 cups semi-sweet chocolate chips or chopped chocolate
- 1 tablespoon coconut oil (optional, for smoother melted chocolate)
How Much Time Will You Need?
This recipe takes about 15 minutes of preparation time and about 1 hour to chill in the refrigerator or freezer. So, you’ll be enjoying these delightful treats in about 1 hour and 15 minutes total!
Step-by-Step Instructions:
1. Prepare the Muffin Tin:
First, line a standard muffin tin with paper cupcake liners or use silicone muffin cups. This will make it super easy to remove your delicious chocolate peanut butter cups later!
2. Make the Peanut Butter Filling:
In a mixing bowl, combine the creamy peanut butter, softened butter, sifted powdered sugar, vanilla extract, and a pinch of salt if you’d like. Use a spoon or a spatula to stir everything together until the mixture is smooth and creamy. This filling is the heart of your treats!
3. Melt Chocolate for the Bottom Layer:
In a microwave-safe bowl, melt 1 cup of chocolate chips (and add coconut oil if using). Heat them in the microwave in 30-second intervals, stirring thoroughly in between each interval until the chocolate is completely melted and smooth. This will serve as the base for your cups.
4. Create the Chocolate Base:
Spoon about 1 teaspoon of the melted chocolate into the bottom of each cupcake liner, using the back of the spoon to spread it out evenly. Once all bottoms are covered, place the tray in the freezer for about 10 minutes to allow the chocolate to set.
5. Fill with Peanut Butter Mixture:
After the chocolate base has set, add about 1 tablespoon of the peanut butter mixture on top of the chocolate in each cup. Make sure to keep it within the edges of the liner to avoid any mess!
6. Melt More Chocolate for the Top Layer:
Now, melt the remaining 1 cup of chocolate chips using the same method as before. Stir well until all the chocolate is smooth and ready.
7. Cover with Chocolate:
Carefully spoon the melted chocolate over the peanut butter layers, ensuring it completely covers the filling. This will create a delicious top layer for your cups!
8. Chill to Set:
Place the muffin tin back in the refrigerator or freezer to chill for at least 30 minutes to 1 hour until the chocolate is firm. This is the hardest part—waiting for them to set!
9. Serve and Enjoy:
Once the chocolate is solid, gently remove the peanut butter cups from the liners. They’re ready to serve! Enjoy your sweet and creamy chocolate peanut butter cups. Store any leftovers in an airtight container in the refrigerator to keep them fresh.
Enjoy these delicious, creamy, and perfectly layered Chocolate Peanut Butter Cups!
Can I Use Natural Peanut Butter Instead of Creamy?
Yes, you can! Just keep in mind that natural peanut butter might be a bit oilier, so it’s best to stir it well before mixing. The flavor will still be amazing!
How Do I Store Leftover Peanut Butter Cups?
Store any leftover cups in an airtight container in the refrigerator for up to 1 week. You can also freeze them for up to 3 months. Just make sure to separate layers with parchment paper if stacking!
Can I Make These Vegan?
Absolutely! Use a plant-based butter substitute and dairy-free chocolate chips. This way, you can enjoy a vegan version of these delicious treats!
What Can I Use Instead of Coconut Oil?
If you don’t have coconut oil, you can omit it or substitute with a neutral oil like vegetable or canola oil. It helps make the chocolate smoother but isn’t strictly necessary.