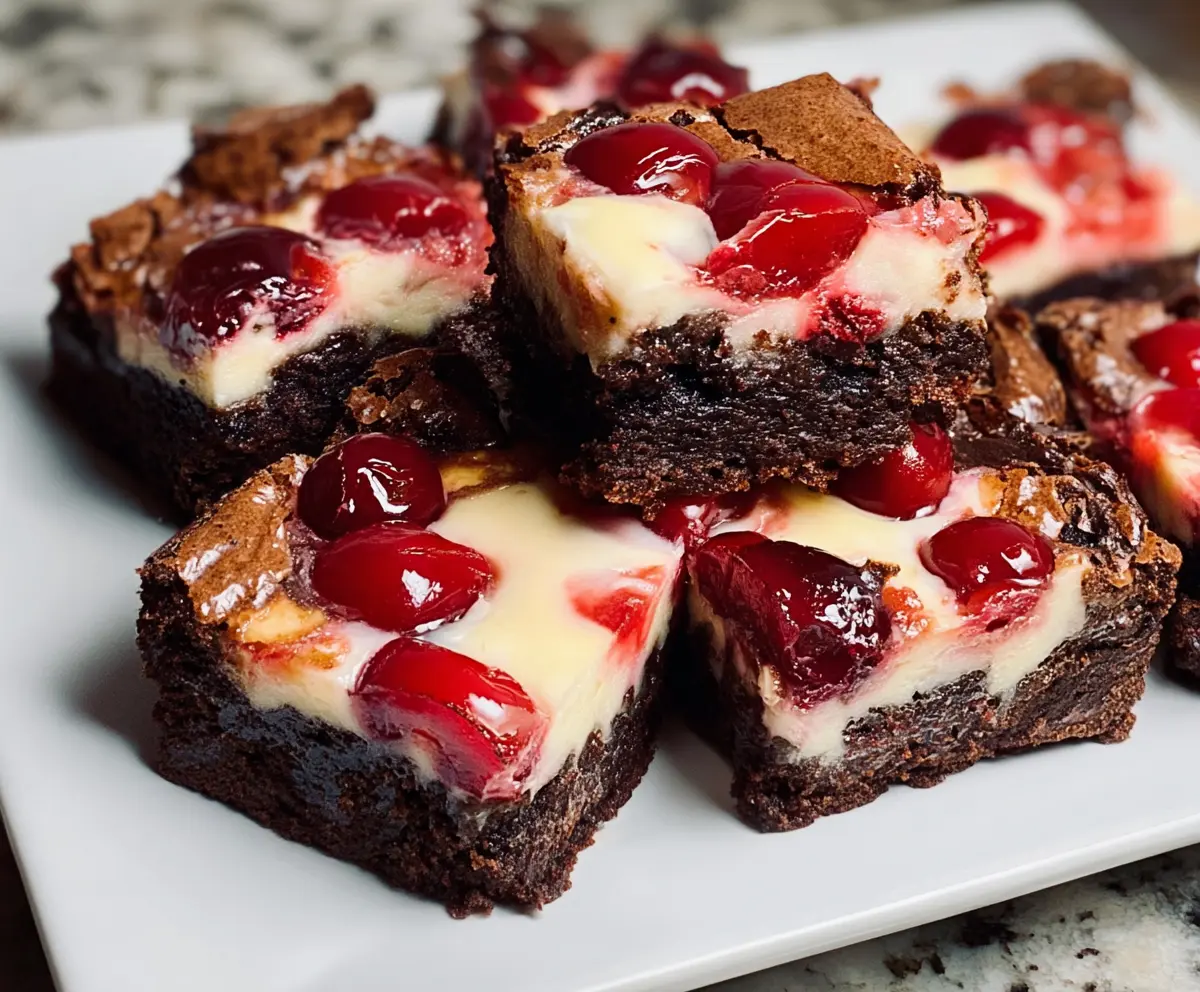
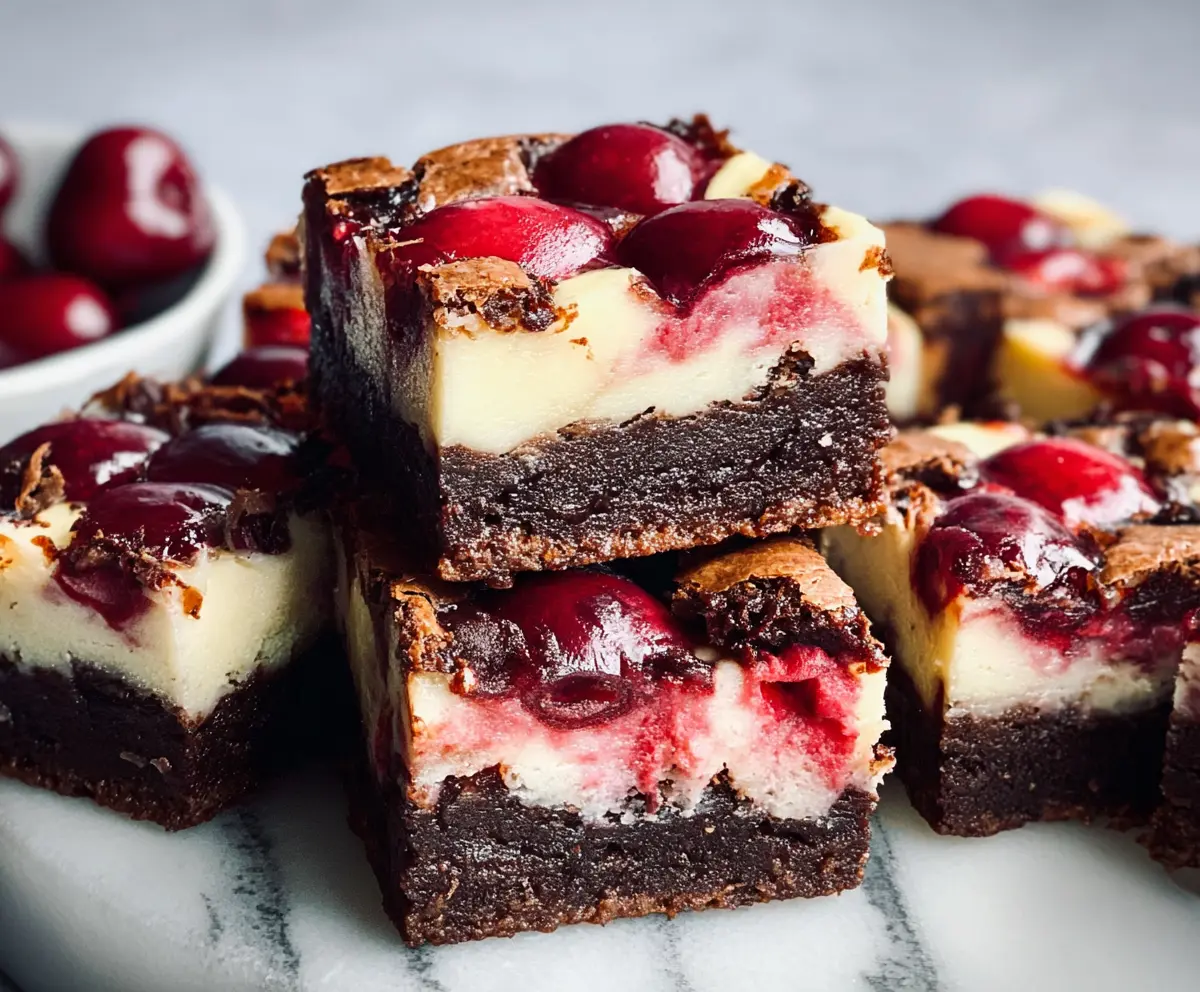
Cherry Cheesecake Brownies are a yummy treat that combines rich brownie goodness with creamy cheesecake and bright cherries. They look impressive and taste even better!
These brownies are perfect for sharing, but honestly, I often hide a few for myself! 🍒 They are simple to make, and watching the layers come together is so fun!
Key Ingredients & Substitutions
Butter: Unsalted butter is key for controlling the saltiness in your brownies. If dairy is an issue, try using coconut oil or a vegan butter substitute. I’ve used both and they work well!
Cocoa Powder: Unsweetened cocoa gives that deep chocolate flavor. If you run out, you can replace it with Dutch-process cocoa for a milder taste, just keep in mind it will change the texture a bit.
Cream Cheese: This is essential for a nice cheesecake layer. For a lighter version, use Neufchâtel cheese. If you’re dairy-free, there are good vegan cream cheese alternatives available!
Cherry Topping: Cherry pie filling is convenient, but fresh cherries are great if you’re in season. You can also try blueberries or raspberries for a different flavor. I often mix up the fruits depending on what I have!
How Do I Get Creamy Cheesecake Without Cracks?
The key to a smooth cheesecake layer is to mix your ingredients gently but well, avoiding any overwhipping which can incorporate too much air. Here’s what to do:
- Always start with softened cream cheese to avoid lumps.
- Mix on low speed and just until combined; stop once the ingredients are blended.
- Don’t skip the refrigeration step! It helps the cheesecake set perfectly.
By keeping it simple and minimal on the mixing, your cheesecake will be creamy and delicious with no cracks in sight!
Cherry Cheesecake Brownies
Ingredients You’ll Need:
For the Brownie Layer:
- 1/2 cup (115g) unsalted butter, melted
- 1 cup (200g) granulated sugar
- 2 large eggs
- 1 teaspoon vanilla extract
- 1/3 cup (40g) unsweetened cocoa powder
- 1/2 cup (65g) all-purpose flour
- 1/4 teaspoon salt
- 1/4 teaspoon baking powder
For the Cheesecake Layer:
- 8 oz (225g) cream cheese, softened
- 1/4 cup (50g) granulated sugar
- 1 large egg
- 1/2 teaspoon vanilla extract
For the Cherry Topping:
- About 3/4 cup cherry pie filling or pitted cherries in syrup (fresh or canned)
How Much Time Will You Need?
This delicious recipe takes about 15 minutes to prep, with an additional 35-40 minutes for baking. After that, you’ll want to cool it for an hour and refrigerate for at least 2 hours before serving. All in all, it’s about 3 hours including cooling time – but the wait is oh-so-worth it!
Step-by-Step Instructions:
1. Preheat the Oven:
Start by preheating your oven to 350°F (175°C). This helps the brownies bake evenly. Grease an 8×8-inch baking pan or line it with parchment paper for easy removal later.
2. Make the Brownie Batter:
In a medium bowl, mix together melted butter, sugar, eggs, and vanilla extract until everything looks smooth and well combined. This is where the magic begins!
3. Combine Dry Ingredients:
In a separate bowl, whisk together the cocoa powder, flour, salt, and baking powder. This step ensures that your brownies come out fluffy and delicious.
4. Mix It All Together:
Gradually add your dry ingredients to the wet mixture, gently stirring until just combined. Be careful not to overmix, or your brownies may turn out dense!
5. Pour and Spread:
Pour the brownie batter into your prepared baking pan and spread it out evenly, making sure every corner is covered with that chocolaty goodness.
6. Prepare the Cheesecake Layer:
In another bowl, beat together the softened cream cheese, sugar, egg, and vanilla extract until everything is smooth and creamy. This will be the delightful cheesecake layer!
7. Layer It Up:
Ladle the cheesecake mixture over the brownie layer. Use a spatula to spread it out gently.
8. Add the Cherry Topping:
Next, spoon the cherry pie filling or your choice of cherries over the cheesecake layer, spreading them around evenly for maximum flavor.
9. Swirl It:
Using a knife or skewer, gently swirl the cheesecake and cherry topping into the brownie batter to create lovely marbled patterns. This makes it pretty while baking!
10. Bake Time:
Now, it’s time to bake! Place the pan in your preheated oven and let it bake for about 35-40 minutes. You’ll know it’s done when the cheesecake is set, and a toothpick inserted into the brownie comes out with just a few moist crumbs.
11. Cool Off:
Remove the pan from the oven and allow the brownies to cool completely on a wire rack. This step is super important for the texture!
12. Chill in the Fridge:
Once cooled, pop the brownies in the refrigerator for at least 2 hours. This sets the cheesecake layer nicely, making it easier to cut and serve.
13. Serve and Enjoy:
Finally, cut your brownies into squares and serve them chilled or at room temperature. Enjoy these delightful Cherry Cheesecake Brownies with friends and family!
Can I Use Low-Fat Cream Cheese in This Recipe?
Absolutely! Low-fat cream cheese works well in this recipe without significantly changing the flavor. Just make sure it’s softened so that it mixes smoothly into the cheesecake layer.
Can I Substitute the Cherries?
Yes! If you’re not a fan of cherries, you can easily substitute them with blueberries, raspberries, or even diced strawberries. Fresh fruit in season will give a nice burst of flavor, but feel free to use canned fruit as well!
How Should I Store Leftovers?
Store any leftover Cherry Cheesecake Brownies in an airtight container in the refrigerator for up to 4 days. They can also be frozen; just wrap them securely in plastic wrap and then foil before placing them in a freezer-safe bag. Thaw in the fridge before serving.
Can I Make This Recipe Gluten-Free?
Yes! To make gluten-free Cherry Cheesecake Brownies, simply substitute the all-purpose flour with a 1:1 gluten-free flour blend. Be sure to check that all the other ingredients, like baking powder, are also gluten-free.