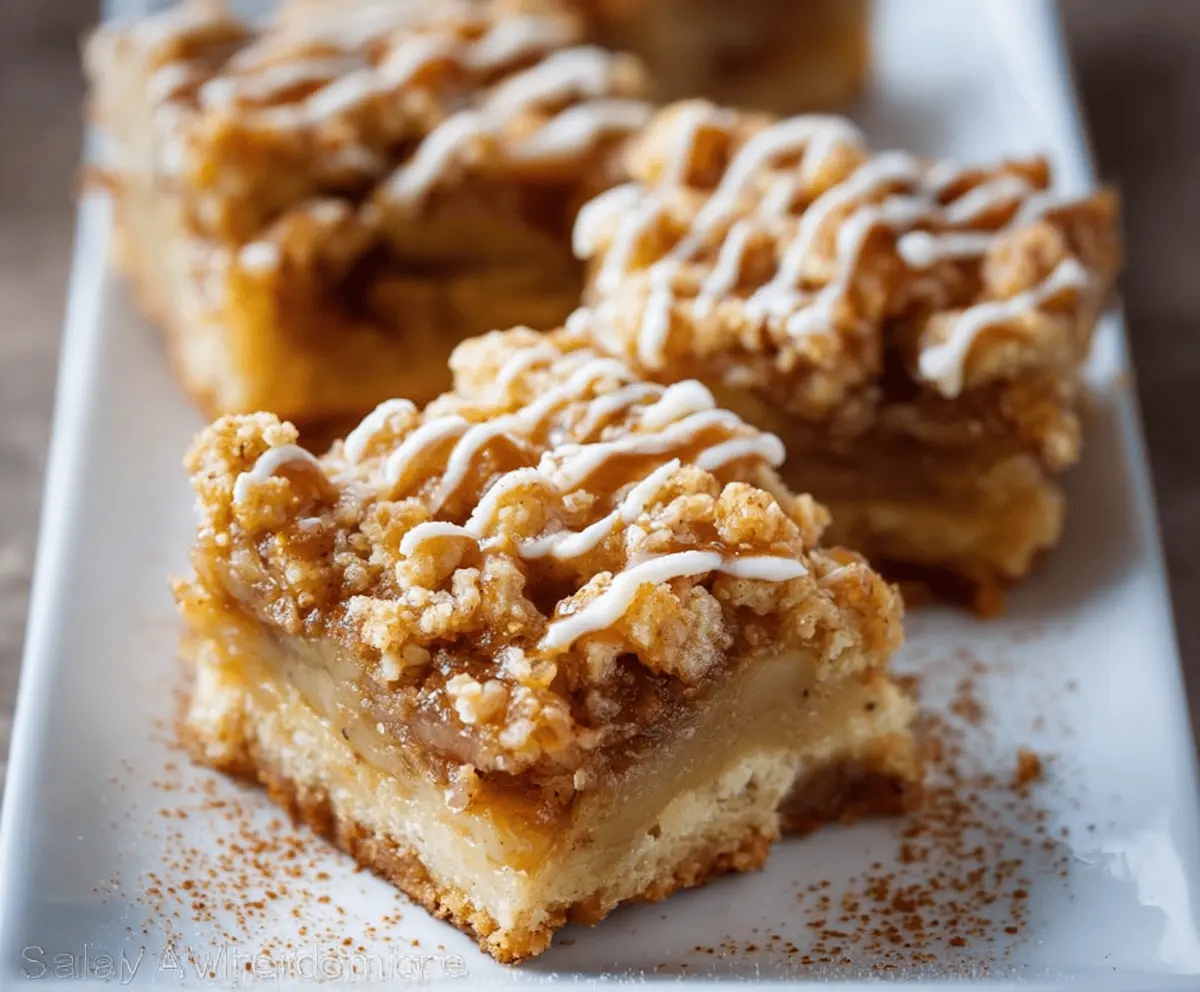
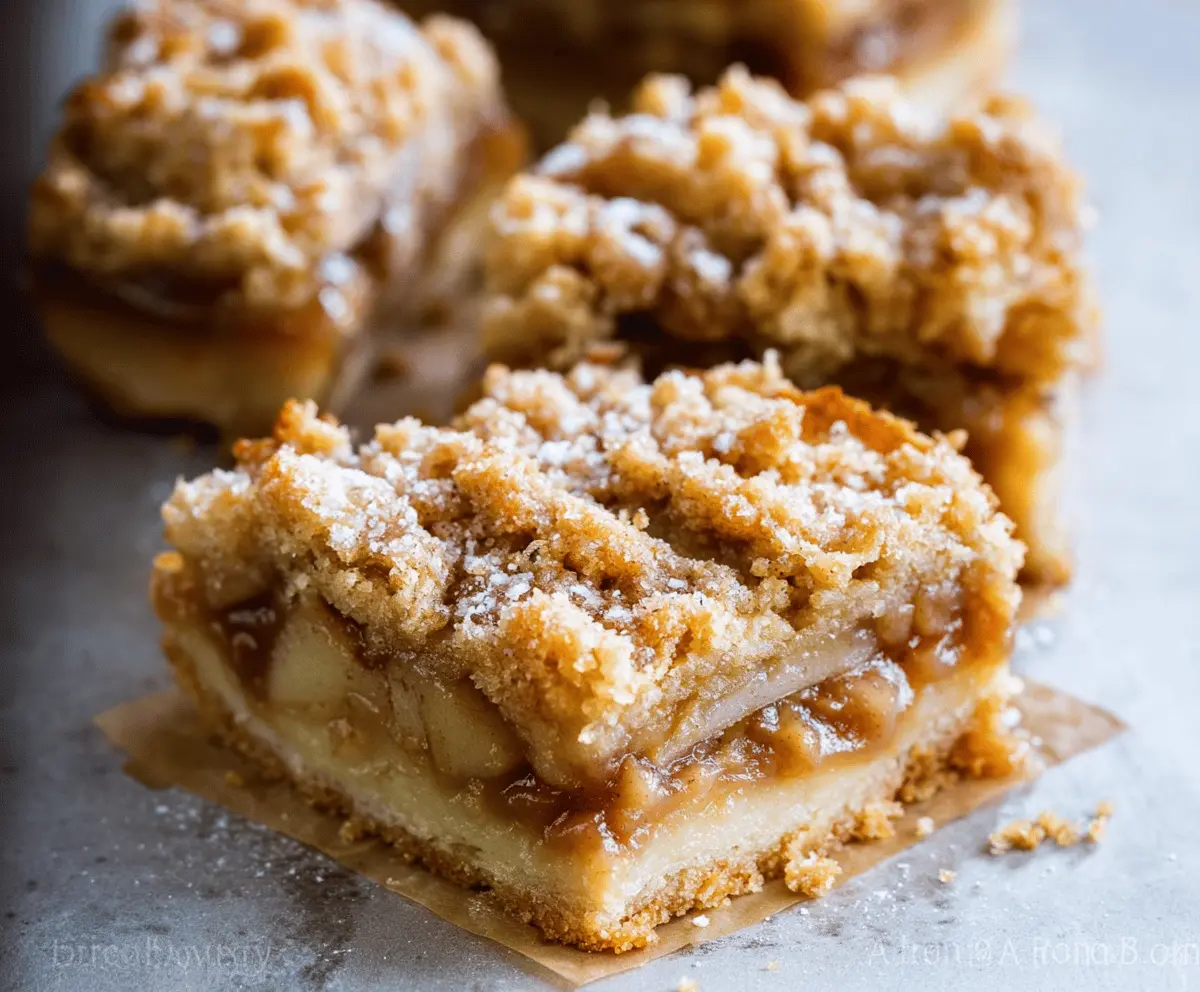
These Apple Pie Bars bring all the cozy flavors of classic apple pie in a handy square shape! With layers of sweet apples and a buttery crust, they’re perfect for a snack or dessert.
Every bite is like a hug from grandma! I love to top them with a scoop of ice cream—just makes everything better. Trust me, you won’t be able to stop at just one! 🍏🍰
Key Ingredients & Substitutions
All-Purpose Flour: This is the backbone of your bars. If you’re looking for gluten-free options, you can try a 1-to-1 gluten-free flour blend. I personally prefer using a lighter flour for a more tender crust.
Granulated Sugar: The sugar adds sweetness and helps with texture. If you’re cutting back on sugar, you can use a natural sweetener like honey or maple syrup, but adjust the liquids in the recipe accordingly.
Butter: Cold, cubed butter gives your crust that flaky texture. If you need a dairy-free option, go for coconut oil or a plant-based butter. Just make sure it’s cold for the best results.
Apples: Granny Smith apples are ideal for their tartness, but feel free to mix with Honeycrisp or Fuji for a sweeter flavor. You can also use canned pie filling if you’re in a hurry—just drain it well.
Cinnamon: A must for that classic apple pie flavor. If you want to play around, add a pinch of nutmeg or allspice for an extra kick!
How Can You Get the Best Texture for Your Crust?
Getting a perfect crust is key for apple pie bars. The secret lies in how you handle the butter and flour. Start by keeping your butter chilled and working it quickly into the flour mixture.
- Use a pastry cutter or your fingers to mix until it looks like coarse crumbs. This helps create flaky layers.
- Don’t overmix; you want little bits of butter still visible. This will melt and create air pockets during baking.
- Press the crust firmly into the pan, but don’t pack it down too hard; it needs some room to rise!
Following these tips will help you achieve that delicious, buttery texture in your apple pie bars. Happy baking! 🍏🥧
How to Make Delicious Apple Pie Bars
Ingredients You’ll Need:
For the Crust and Topping:
- 2 1/2 cups all-purpose flour, divided
- 1 cup granulated sugar, divided
- 1 1/2 teaspoons baking powder
- 1/4 teaspoon salt
- 1 cup (2 sticks) unsalted butter, cold and cubed
For the Filling:
- 2 large eggs
- 1 teaspoon vanilla extract
- 2 cups peeled and thinly sliced apples (about 2 medium apples)
- 1 teaspoon ground cinnamon
- 1/4 cup brown sugar
For the Icing:
- 1 cup powdered sugar
- 2-3 tablespoons milk or cream (for icing/drizzle)
How Much Time Will You Need?
The total time for making these delicious Apple Pie Bars is about 1 hour and 10 minutes. This includes around 15 minutes for prep and 45-55 minutes for baking. You’ll need some extra time to cool them before adding the icing, but I promise it’s worth the wait!
Step-by-Step Instructions:
1. Preheat the Oven:
Start by preheating your oven to 350°F (175°C). While it’s warming up, prepare your baking pan by greasing it or lining it with parchment paper for easy removal later on.
2. Make the Crust Mixture:
In a large bowl, mix 2 cups of flour, 1/2 cup of sugar, baking powder, and salt together. Then, add the cold cubed butter. Using a pastry cutter, fork, or your fingers, blend the butter until you get a mix that looks like coarse crumbs. This is where the flakiness comes from!
3. Form the Crust:
Next, set aside about 1 cup of this crumb mixture for the topping. Press the rest of the mixture evenly into the bottom of the prepared pan to form a solid crust. It should be nice and even.
4. Prepare the Filling:
In a small bowl, whisk together the eggs and vanilla extract until smooth. In another bowl, toss the sliced apples with the remaining 1/2 cup of sugar, cinnamon, and brown sugar. This will make the apples sweet and flavorful!
5. Assemble the Bars:
Pour the egg mixture evenly over the crust, then layer the sliced apples on top. It’s going to look delicious! Finally, sprinkle the reserved crumb mixture over the apples to finish.
6. Bake:
Put the pan in the oven and bake for about 45-55 minutes, or until the top is golden brown and the apples are soft. Keep an eye on them—you want that lovely crispy top!
7. Cool:
Once they’re done baking, take them out of the oven and let them cool completely in the pan on a wire rack. This step is really important to get the best texture.
8. Ice and Serve:
To make the icing, whisk the powdered sugar with milk or cream until it’s a smooth consistency. Drizzle this icing over the cooled bars before cutting them into squares. Optionally, you can dust a bit of cinnamon on top for that extra touch.
Enjoy your delicious Apple Pie Bars! They’re perfect for any occasion, whether it’s a family dessert night or a picnic treat!
Can I Use Different Types of Apples for This Recipe?
Absolutely! While Granny Smith apples work great for their tartness, feel free to mix different varieties like Honeycrisp or Fuji for added sweetness. Just make sure to choose apples that hold their shape when baked.
How Should I Store Leftover Apple Pie Bars?
Store leftover bars in an airtight container at room temperature for up to 3 days. If you need to keep them longer, you can refrigerate them for up to a week, but they may lose some of their crispness.
Can I Make These Apple Pie Bars Ahead of Time?
Yes, you can prepare the bars a day in advance. Just bake them, let them cool completely, and store them in an airtight container. Add the icing just before serving for the freshest taste.
What Can I Use Instead of Butter for a Dairy-Free Version?
If you’re looking for a dairy-free alternative, you can use coconut oil or a plant-based butter substitute. Just ensure it’s cold and cubed to maintain the texture of the crust!