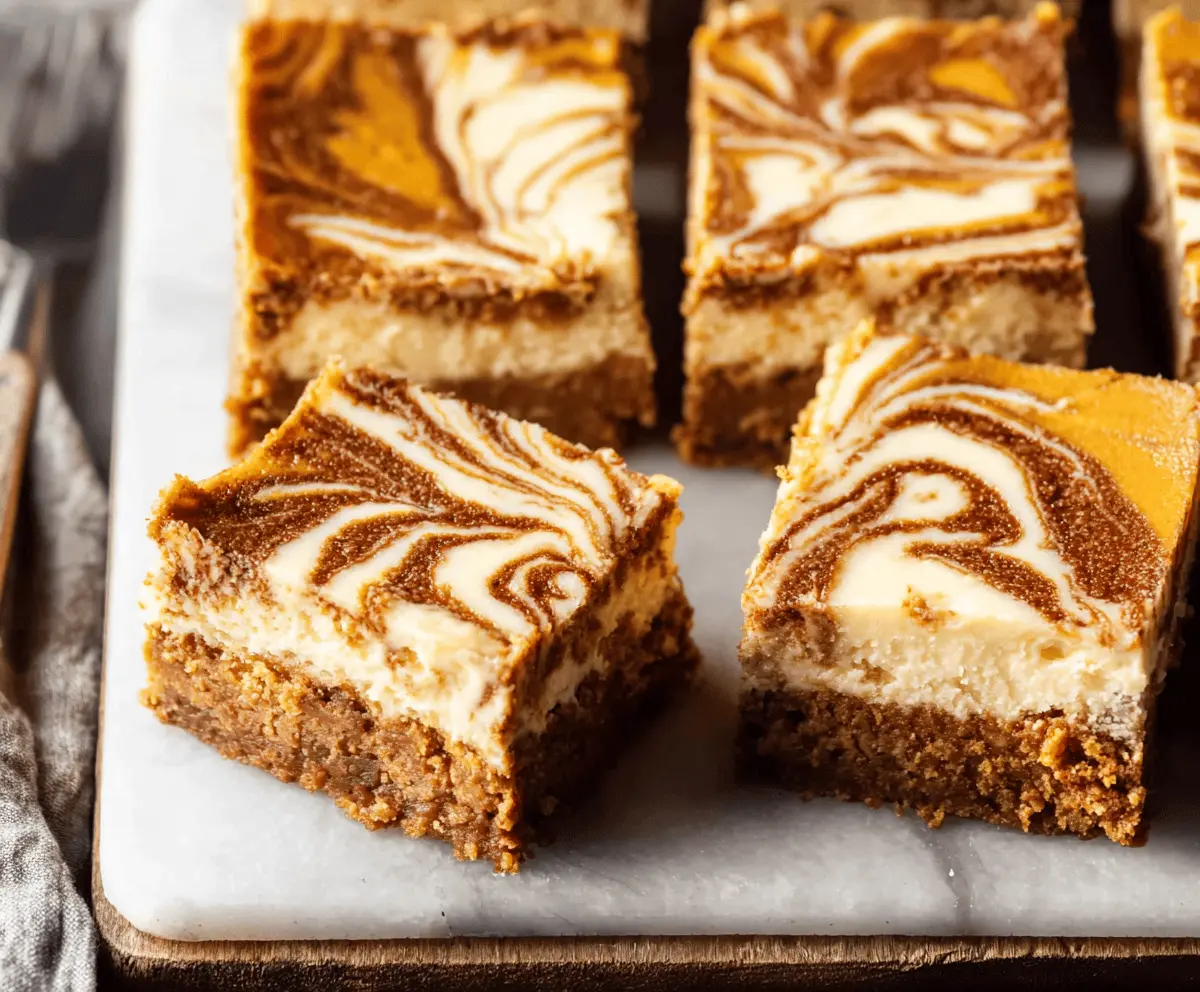
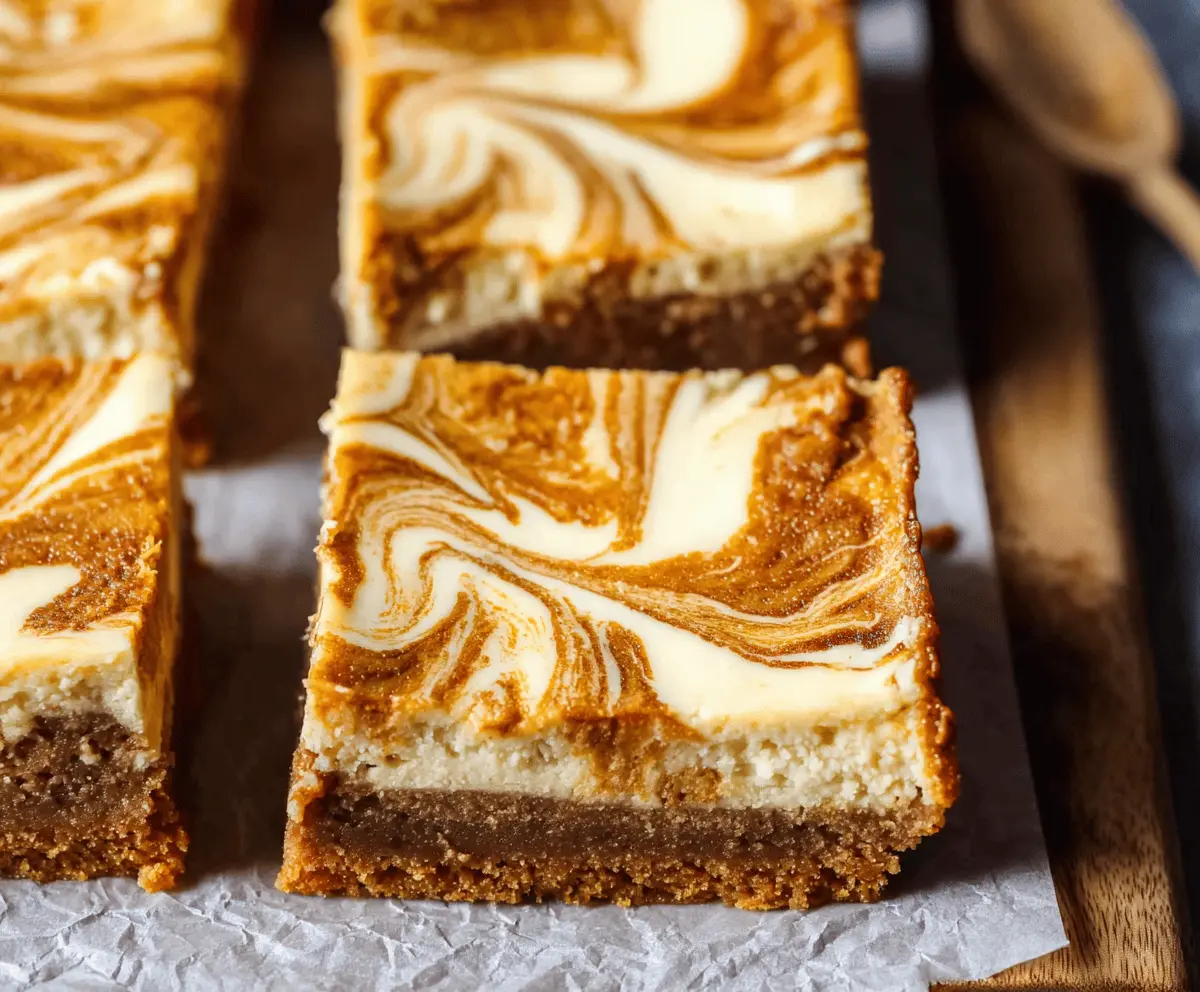
These Pumpkin Swirl Cheesecake Bars are creamy, delicious, and perfect for fall! With a tasty pumpkin mixture swirled into rich cheesecake, every bite is a treat!
Making these bars is a breeze, and they disappear quickly at gatherings. I love serving them topped with whipped cream—it makes everything sweeter! 🎃
Key Ingredients & Substitutions
Graham Cracker Crumbs: This forms the base of the bars. If you’re looking for a gluten-free option, you can use gluten-free cracker crumbs or crushed almond flour cookies instead. I love the flavor that graham crackers bring, but experimenting is fun!
Cream Cheese: Make sure it’s well softened for a smooth texture. If you’re dairy-free, a vegan cream cheese can work here, but the texture might be slightly different. I’ve used both and they both turn out tasty!
Canned Pumpkin Puree: This is essential for that classic pumpkin flavor. If you can’t find canned pumpkin, you can make your own by roasting and pureeing a pumpkin. I find canned is much easier, especially when pressed for time.
Sour Cream: It adds creaminess. You could substitute with Greek yogurt for a healthier twist. I often use Greek yogurt and love the tang it brings!
How Do You Get the Perfect Swirl?
Swirling the pumpkin mixture into the cheesecake can be tricky, but here are my tips to nail it:
- Once your pumpkin mixture is dropped onto the cheesecake layer, use a knife or skewer to gently swirl back and forth. Don’t overdo it, or you’ll mix too much!
- Start at the edges and work your way to the center to create that beautiful marbled pattern.
- Remember, a little mixing is great, but you want to see the distinct layers to appreciate the pumpkin swirl!
Following these tips will help your bars look stunning while keeping that delicious blend of flavors intact. Happy baking!
How to Make Pumpkin Swirl Cheesecake Bars
Ingredients You’ll Need:
For the Crust:
- 2 cups graham cracker crumbs
- 1/2 cup (1 stick) unsalted butter, melted
- 1/4 cup granulated sugar
- 1 tsp ground cinnamon
- 1/4 tsp ground nutmeg
For the Cheesecake Layer:
- 16 oz (2 packages) cream cheese, softened
- 3/4 cup granulated sugar
- 2 large eggs
- 1 tsp vanilla extract
- 1/2 cup sour cream
For the Pumpkin Swirl:
- 1 cup canned pumpkin puree
- 1/3 cup packed brown sugar
- 1/2 tsp ground cinnamon
- 1/4 tsp ground ginger
- 1/4 tsp ground nutmeg
- 1/8 tsp ground cloves
- 1 large egg
How Much Time Will You Need?
This recipe will take about 30 minutes to prepare and 40-45 minutes to bake. After baking, you’ll want to let your bars cool completely and chill them in the fridge for at least 4 hours or overnight. So, overall, it’s a commitment of about 5 hours, but most of that is just waiting time while they chill!
Step-by-Step Instructions:
1. Preparing the Crust:
Start by preheating your oven to 325°F (163°C). While that’s warming up, grab a 9×9-inch square baking pan and line it with parchment paper or lightly grease it. In a medium bowl, mix together the graham cracker crumbs, melted butter, sugar, cinnamon, and nutmeg until everything is well combined. Press this mixture firmly into the bottom of the baking pan to create a nice, even layer. Bake for 10 minutes, then take it out and set aside.
2. Making the Cheesecake Layer:
While the crust is baking, take the opportunity to prepare the cheesecake layer. In a large mixing bowl, beat together the softened cream cheese and sugar until the mixture is smooth and creamy. Add the eggs one at a time, making sure to mix well after each addition. Finally, stir in the vanilla extract and sour cream until everything is fully combined.
3. Creating the Pumpkin Swirl:
In a separate bowl, prepare the pumpkin swirl. Mix together the pumpkin puree, brown sugar, ground cinnamon, ginger, nutmeg, cloves, and egg until the mixture is smooth. This is where the magic begins!
4. Assembling the Bars:
Now it’s time to put it all together! Pour the cream cheese mixture over the baked crust and spread it evenly. Next, drop spoonfuls of the pumpkin mixture on top of the cheesecake layer. Using a knife or skewer, gently swirl the pumpkin mixture into the cheesecake to create a beautiful marbled effect. Remember not to mix it too much—just a few swirls will do!
5. Baking the Bars:
Place the pan in the preheated oven and bake for about 40-45 minutes, or until you see that the edges are set and the center has a slight jiggle. Keep an eye on it; you don’t want to overbake!
6. Cooling and Serving:
Once baked, remove the bars from the oven and let them cool completely at room temperature. After they have cooled, cover them and place them in the refrigerator to chill for at least 4 hours or even overnight. This helps the flavors meld together beautifully!
7. Final Touches:
When you’re ready to serve, cut the bars into squares. If you’d like, top them with a dollop of whipped cream for an extra special treat. Enjoy your delicious Pumpkin Swirl Cheesecake Bars!
These creamy, spiced bars with their lovely marbling will surely delight everyone who tries them. Happy baking! 🎃
Can I Use a Different Type of Crust?
Absolutely! If you prefer a gluten-free option, you can use gluten-free cookie crumbs or almond flour for a different flavor. Traditional pie crust can also work if you want a flaky alternative.
How Do I Store Leftovers?
Store any leftover Pumpkin Swirl Cheesecake Bars in an airtight container in the refrigerator for up to 5 days. You can also freeze them for up to 3 months—just make sure to wrap them tightly to prevent freezer burn!
Can I Substitute the Sour Cream?
Yes, Greek yogurt is a great substitute and will provide a similar creaminess and tang. You can also use crème fraîche or even a dairy-free yogurt if you need a dairy-free option.
Is There a Way to Make It Dairy-Free?
Definitely! Use dairy-free cream cheese and swap in coconut cream or dairy-free yogurt for the sour cream. Everything else can remain the same, and you’ll still achieve a lovely creamy texture!