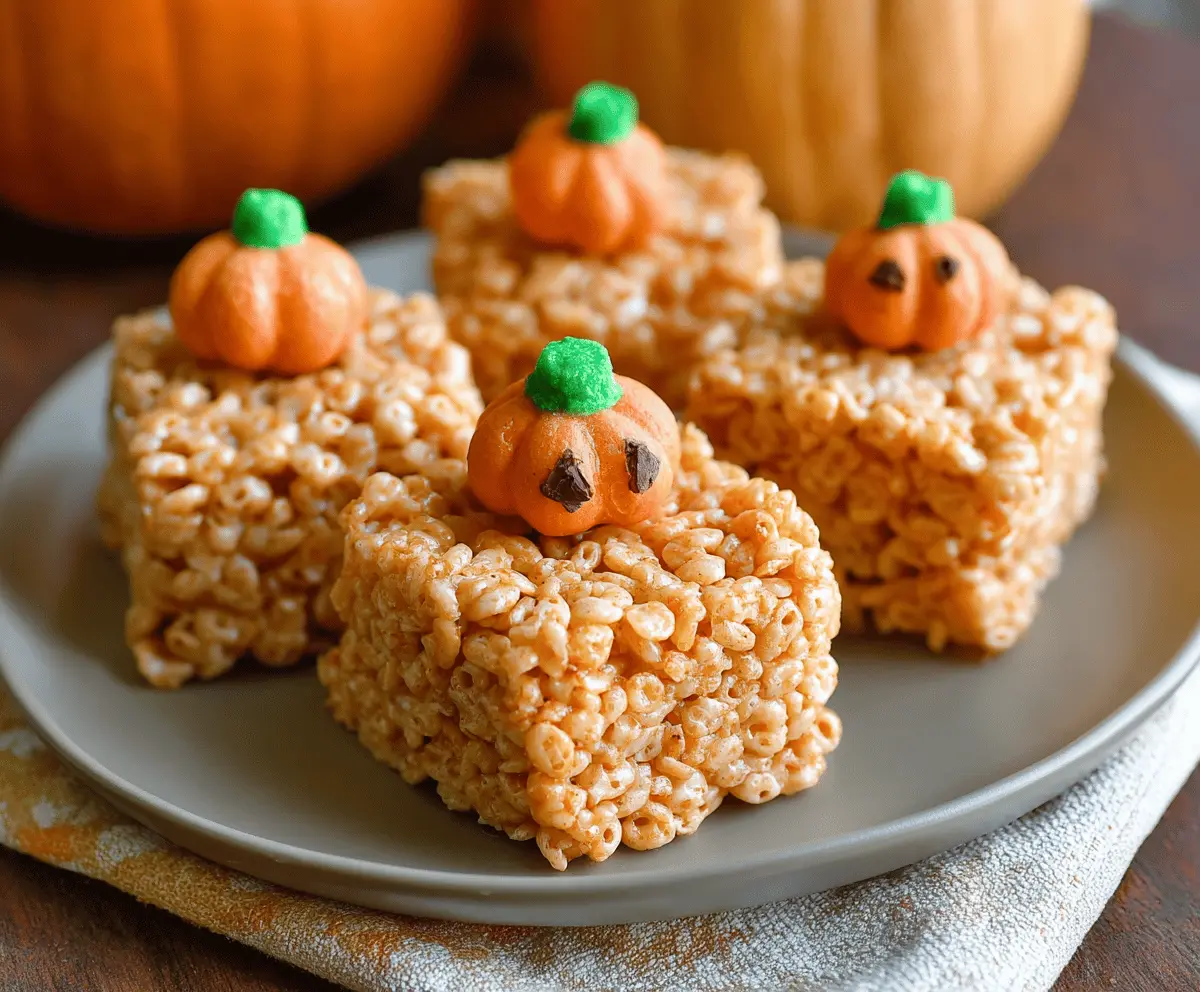
These Pumpkin Rice Krispie Treats are a fun twist on a classic snack! Made with crunchy Rice Krispies and the warm flavors of pumpkin and spice, they are perfect for fall.
Who knew you could turn a simple treat into something festive? I love how quick and easy these are to make—just melt, mix, and press! Plus, they look super cute on a party table! 🎃
Key Ingredients & Substitutions
Rice Krispies Cereal: This classic cereal gives the treats their signature crunch. If you can’t find Rice Krispies, try using any puffed rice cereal or check for gluten-free options if needed.
Mini Marshmallows: They provide the gooeyness needed to bind everything together. If you’re looking for a lower-sugar version, try using sugar-free mini marshmallows, or make your own marshmallow mixture from scratch for a special touch.
Canned Pumpkin Puree: This is what gives the treats their flavor and color. If you’re out of canned pumpkin, you can use freshly cooked and puréed pumpkin or even mashed sweet potatoes for a slightly different taste.
Spices: Ground cinnamon, nutmeg, and ginger are key to achieving that cozy fall flavor. If you want to simplify or adapt for allergies, consider using pumpkin pie spice, which includes all these spices in one blend.
Pumpkin-shaped Candies: These candies make the treats festive! If you can’t find them, consider using candy corn, chocolate chips, or even fresh berries as a topping.
How Do I Make My Rice Krispie Treats Perfectly Gooey and Not Too Sticky?
The key to achieving the perfect texture lies in the melting and mixing process. Here are some tips to help you out:
- Heat the butter on low to avoid browning it, which could change the flavor.
- Ensure the marshmallows are completely melted before adding the pumpkin puree and spices. This makes blending easier.
- Use a greased spatula to fold the cereal into the marshmallow mixture gently; this helps keep the treats light and airy.
- Press the mixture firmly into the pan but avoid over-compressing it, as that can lead to tough treats.
- Let them cool at room temperature to set; putting them in the fridge can sometimes make them too hard.
Following these tips will help you create delightful Pumpkin Rice Krispie Treats that are just the right amount of chewy and sweet!
How to Make Pumpkin Rice Krispie Treats
Ingredients You’ll Need:
For the Treats:
- 6 cups Rice Krispies cereal
- 1 (10 oz) package mini marshmallows (or about 4 cups regular marshmallows)
- 3 tablespoons unsalted butter
- 1/2 cup canned pumpkin puree
- 1 teaspoon vanilla extract
- 1 teaspoon ground cinnamon
- 1/2 teaspoon ground nutmeg
- 1/4 teaspoon ground ginger
- Pinch of salt
For the Garnish:
- Pumpkin-shaped candies or decorations (optional)
How Much Time Will You Need?
This delightful recipe takes about 10 minutes of prep time, plus an additional 30 minutes for the treats to cool and set. So, in total, you’ll need about 40 minutes before you can enjoy these tasty treats!
Step-by-Step Instructions:
1. Melt the Butter
Begin by placing a large pot or deep skillet on low heat. Add the unsalted butter and stir occasionally until completely melted. Be careful not to let it brown!
2. Add the Marshmallows
Once the butter is melted, dump in the mini marshmallows. Keep stirring continuously until the marshmallows are fully melted and smooth. This is the glue that holds everything together!
3. Stir in the Pumpkin and Spices
Remove the pot from heat and carefully stir in the canned pumpkin puree, vanilla extract, ground cinnamon, nutmeg, ginger, and pinch of salt. Mix until everything is well combined and you can see a beautiful orange color.
4. Mix in the Rice Krispies
Now, it’s time for the Rice Krispies! Pour the cereal into the melted marshmallow mixture. Gently fold the cereal in using a spatula, making sure every piece is coated without crushing the cereal too much.
5. Prepare Your Baking Pan
Lightly grease a 9×13-inch baking pan with cooking spray or line it with parchment paper to make removing the treats easier later on.
6. Press the Mixture into the Pan
Transfer the Rice Krispies mixture into the prepared pan. Use a greased spatula or a piece of wax paper to press the mixture down evenly and firmly. Make sure it’s packed well but not overly compressed.
7. Cool and Set
Let the mixture cool at room temperature for about 30 minutes. This will help it set up nicely, ready for cutting!
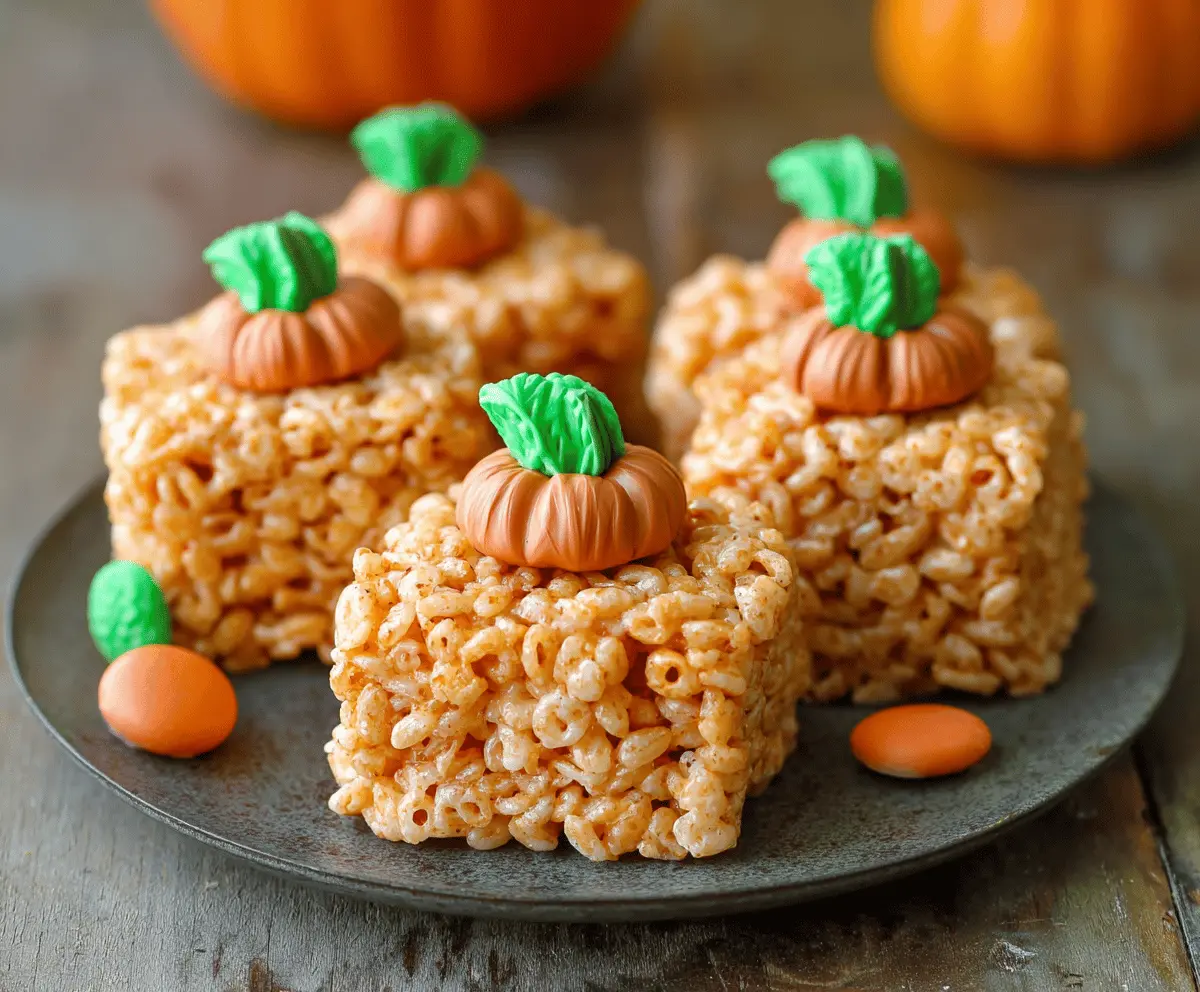
8. Cut and Decorate
Once set, carefully cut your treats into squares. Get creative and decorate each square with pumpkin-shaped candies or other fun decorations on top to make them festive!
9. Serve and Enjoy!
Now, it’s time to dig in! Serve these delicious Pumpkin Rice Krispie Treats at your next gathering, or enjoy them as a special fall snack!
These treats are not only soft and chewy but packed with a wonderful pumpkin spice flavor. Perfect for cozy autumn days or Halloween parties!
Can I Use Different Types of Cereal?
Absolutely! While Rice Krispies are traditional, you can substitute with any puffed cereal like Corn Pops or even use a gluten-free puffed rice for a variation. Just ensure it’s a cereal that crunches well!
How Can I Store Leftover Pumpkin Rice Krispie Treats?
Store any leftovers in an airtight container at room temperature for up to 3 days. Just make sure to place sheets of parchment paper between layers to prevent sticking.
Can I Make These Treats Vegan?
Yes! You can make these treats vegan by using dairy-free butter and vegan marshmallows, which are available in many grocery stores. Just double-check the labels to ensure they’re entirely plant-based.
What If My Treats Are Too Sticky or Hard?
If your treats are too sticky, you may have added too much pumpkin puree. To fix this, use less puree next time, or you can add a bit more Rice Krispies to balance it out. If they end up hard, it may be due to over-compressing the mixture; be gentle when pressing into the pan.